How to Build a Gallery Wall Mockup That Sells a Diptych or Triptych Set as a Bundle on Etsy
Selling a multi-print set on Etsy is a different problem from selling a single poster. A buyer looking at a diptych or triptych listing needs to see the prints together, in a real room, before they can picture spending money on two or three pieces at once. A flat, white-background image of each print side by side does not do that job. A gallery wall mockup does.
This guide walks through the full process: understanding why the bundle format demands a specific visual approach, how to prepare your artwork files so they drop cleanly into multi-frame templates, how to use Mockupanda's multi-frame rendering through the API, and how to build a consistent set of listing images that covers every Etsy image slot without repeating the same style.
Why a Diptych or Triptych Bundle Needs Its Own Mockup Strategy
The bundle sale is a visual argument
When a buyer lands on a single-print listing, the question they are answering is simple: do I like this design enough to put it on my wall? When they land on a bundle listing, the question is harder: will these prints look good together, do they fit the space I am picturing, and is paying for all of them at once worth it over buying separately?
Your mockup images are what answers those questions. A gallery wall scene where the two or three prints are already hanging together, with a sofa underneath or a dining table nearby, closes the gap between imagination and decision. It makes the set feel like a finished room, not a collection of files.
A single standalone mockup of one print from the set, repeated across all your image slots, cannot do that. It fragments the story you are trying to tell.
Consistency across the set matters as much as the individual scenes
If your diptych listing has one image in a boho living room and the next image in a stark white gallery, the prints look like they belong to different products. Buyers read visual inconsistency as a signal that the shop is amateur or that the product itself is uncertain.
Building a mockup set that uses the same rooms, the same frame style, and the same light across every image slot creates the opposite impression: the set looks designed, intentional, and worth the bundle price. Consistent templates across a themed collection are part of what builds trust in a wall art shop well before a buyer reads the listing description.
Takeaway: Before you open the editor, decide on two or three room scenes and one frame finish, and use only those across your entire set of listing images. That constraint is what makes the bundle feel like a bundle.
Getting Your Artwork Files Ready for Multi-Frame Templates
Understanding frame ratios before you export
Every template in Mockupanda's library is set to one print ratio: A series, 3:4, 2:3, 4:5, Square, or 4:3. For a diptych or triptych, check the template's ratio before you prepare each panel.
If your artwork does not match the frame ratio, the editor flags the mismatch and the result gets cropped or stretched, which is exactly the thing that makes a mockup look wrong. The practical fix is simple: before you export your print files from your design software, check which ratio the template expects and export to that ratio exactly.
For a triptych where each panel is a vertical 2:3, you need three separate files at 2:3 each. For a diptych with square frames, you need two square files. You are not uploading one wide image that spans the whole set; you are uploading one file per panel, and each file needs to match the frame it goes into.
Naming and organizing your panel files
This sounds obvious but it saves real time: name your files so the panel order is immediately clear. Something like forest-diptych-left.png and forest-diptych-right.png means you never have to open the files to remember which is which. For a triptych, left, center, and right panel labels prevent the common mistake of uploading the panels in the wrong order.
In the Mockupanda API, multi-frame templates use artwork_urls with frame indices starting at 0. Frame 0 is the first panel, frame 1 is the second, and frame 2 is the third for a triptych. If you pass the files in the wrong index order, the panels render in the wrong sequence, which matters a lot for a set that tells a visual story across its panels.
If you are using the web editor rather than the API, having clearly named files in a tidy folder means you can drop them in confidently without second-guessing yourself mid-workflow.
Takeaway: Export each panel as a separate file at the correct ratio, name the files with their panel position, and you will avoid every ratio mismatch and ordering error before the editor even opens.
Building the Gallery Wall Scene in the Editor
Placing and adjusting each panel
Once you are inside Mockupanda's live editor, the perspective mapping handles the geometry for you. As you drag a panel to reposition it or pull an edge to resize it, the perspective follows the frame, so you are not manually aligning a flat overlay to match the angle of the wall. The room's light and shadows stay on the print as you move it, which is what makes the result look like a photograph rather than a composite.
The file you download is the preview you see, at full resolution, so what you see in the browser is what you get in the JPEG.
If you notice a sizing issue, for example one panel looks slightly wider than it should relative to its neighbor, go back and check your source file ratio against the template's frame ratio. The editor will flag a mismatch if the ratios do not match. Fixing it at the source file level and re-uploading is faster than trying to compensate by dragging.
Choosing scenes that reinforce the bundle story
For a diptych or triptych bundle, the scenes you pick should tell a buyer where in their home the set belongs. A living room scene with both panels hanging above a sofa answers the question of whether the set fits a living room. A bedroom scene answers the bedroom question. If your set is targeted at a specific room type, lead with that scene as your primary listing image.
Beyond that, vary the angle and mood across your image slots without breaking the frame and room consistency you established upfront. A wide shot showing the full set in context, a closer crop that lets the buyer read the detail in the panels, and a lifestyle angle that includes furniture and plants all serve different moments in the buyer's decision process without contradicting each other.
If the template library does not have the exact room you are picturing, the AI scenes feature lets you generate a new room, alter an existing scene, or start from a photo you took yourself. Your panels still go in exactly as you made them.
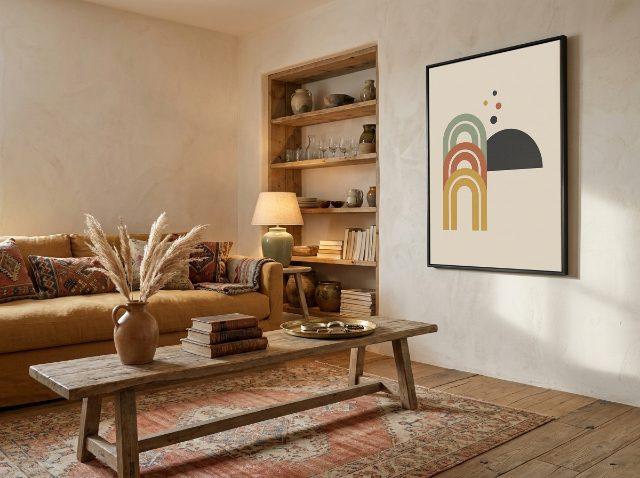
Takeaway: Use the live editor to position and size your print, check the preview before downloading, and choose room scenes that answer your target buyer's specific question about where the set would live in their home.
Rendering in Bulk and Building Your Full Set of Listing Images
Using bulk mockups to cover all your image slots at once
Etsy gives you ten image slots per listing. For a bundle listing, you want to fill those slots with enough variety to tell the full story of the set: different rooms, a close-up detail shot, perhaps a size reference, and an image that shows the two or three prints together clearly. Creating all of those one by one is the step that slows most shops down.
The bulk mockup workflow in Mockupanda lets you upload your designs, pick your templates, and render every combination at once. All the resulting listing photos download as a single ZIP file, ready to drag into your Etsy listing. You are not waiting for each mockup to render individually; they all process together.
Saving a Set for future listings in the same series
If you are selling multiple diptych or triptych designs in the same style, for example a botanical series where each pair of prints has the same dimensions and targets the same buyer, you do not want to re-select your templates every time you list a new design.
Mockupanda's Sets feature lets you save a named, ordered group of templates. Create a set called something like "Botanical Diptych Scenes" with the three or four room templates you use for every listing in that series, and then apply the whole set to any new design with a single selection. The set belongs to your account and can mix library templates with your own custom ones.
This compounds over time. The first listing in a series takes the longest to set up. Every listing after that takes a fraction of the time because the template selection is already done.
Takeaway: Run a single bulk mockup pass to generate all listing images at once, download the ZIP, and save your template selection as a named Set so the next design in the series starts from a finished workflow rather than a blank slate.
Handling Multi-Frame Bundles Through the API
When programmatic rendering makes sense
If you are building out a large catalog of multi-print sets, or if you have a shop tool that handles listing creation automatically, rendering mockups manually through the web editor does not scale. The Mockupanda API lets you generate mockups programmatically with a POST /api/v1/mockups/generate request, which means you can trigger rendering as part of your own workflow without touching the browser.
For multi-frame templates, the API uses artwork_urls rather than artwork_url. You pass an object where each key is a frame index as a string, starting at "0", and the value is the URL of the artwork for that frame. A triptych request passes "0", "1", and "2" as keys, each pointing to the corresponding panel file.
This is where the file organization advice from earlier pays off at scale. If your panel files are stored with predictable naming conventions, your code can construct the artwork_urls object programmatically without manual lookup.
Keeping costs and credits under control
API credits cost $0.01 each, one credit renders one mockup, and credits never expire. Failed requests cost zero credits. For a triptych listing where you want six scene mockups, that is six credits, six cents, per listing.
You can pass up to 12 templates in a single request using batch mode, so a full set of listing images for one bundle listing can often be generated in a single API call. The default output is 2000px wide with JPEG quality at 85, and you can go up to 4000px wide if you need higher resolution for print-quality proof images.
If you use the same group of templates across every listing in a series, you can save them as a Set in the app and pass the set_id in your API request instead of listing out every template ID each time. The set belongs to the account that owns the API key and can mix library templates with custom ones, so you have full control over which scenes render for which product category.
Takeaway: For catalog-scale multi-print listing creation, use artwork_urls with indexed frame keys to handle diptych and triptych templates in the API, batch up to 12 templates per request, and use a saved Set to keep your template list reusable across every listing in the series.
Putting It All Together for Your Etsy Listing
Structuring your image slots for maximum conversion
Etsy buyers scroll through images quickly, so your first image has to do the most work. For a diptych or triptych bundle, that first image should show all the panels together in a finished room scene. It is the clearest possible answer to "what am I buying and where does it go?"
After that, work through your remaining slots in an order that answers progressively more specific questions. A wider room shot that shows the scale of the set relative to furniture helps buyers who are worried about size. A closer crop that shows the print detail rewards buyers who want to inspect the artwork. A second room type broadens the appeal and suggests the set is versatile. A size guide image showing the panels next to something familiar, like a standard doorframe, closes out the practical questions.
That structure, scene then detail then variety then practicality, is a logical sequence that maps to how buyers actually evaluate a bundle purchase. Your mockups are not decoration for the listing; they are the argument for why the bundle is worth buying.
Keeping the full listing visually cohesive
The frame finish, room palette, and lighting style you chose at the start of this process should run consistently through every image slot. That consistency is what makes a gallery wall mockup set feel like a professional product rather than a collection of separately assembled images.
If you are listing multiple diptych or triptych sets in the same shop, extending that consistency across all your listings, same frame, same two or three rooms, same general aesthetic, makes your shop feel curated. Buyers who browse your shop after landing on one listing see a coherent catalog, not a random assortment, and that coherence is part of what makes them trust the bundle price.
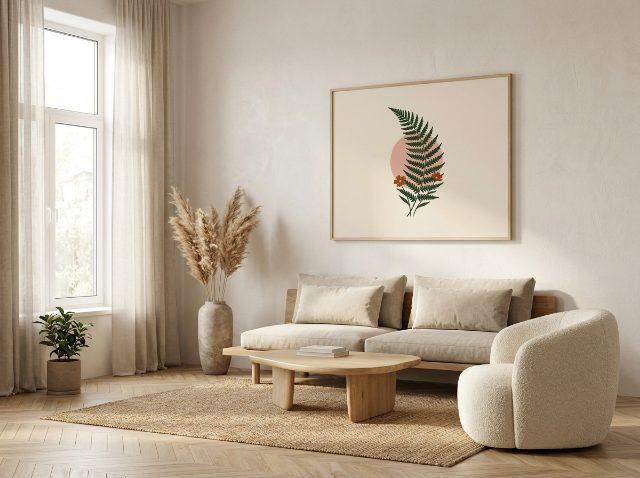
Takeaway: Lead with a full multi-frame room scene as your first image, sequence the remaining slots to answer specific buyer questions in order, and maintain the same frame and room style across every image in the listing and across every listing in the shop.
Keep reading

Shopify Mockup Generator: How to Push Bulk-Generated Listing Photos Directly to Your Shopify Store Without Manual Uploads
How to Upload a Custom PSD Template to a Mockup Generator So Your Brand's Unique Scenes Render Consistently at Scale