How to Trigger Automatic Mockup Generation via API When a New Design Lands in Your Google Drive or Dropbox
There is a version of your print-on-demand workflow where you finish a design, drop it into a folder, and walk away. By the time you come back, the mockups are already done, named, and ready to go into your listings. No manual uploads, no repetitive clicking, no context-switching between tools.
That version is not some distant future. It is something you can build this week using Google Drive or Dropbox, a free automation platform like Make or Zapier, and the Mockupanda API.
This post walks you through exactly how to set it up, from the logic behind the trigger to the practical steps of building the workflow, even if you have never touched an API before.
Why Manual Mockup Uploads Are Costing You More Than You Think
The Hidden Time Tax on Every New Design
Most sellers think about their mockup process in terms of minutes per design. It takes five minutes to upload a file, pick a template, generate the mockup, download it, rename it, and move it to the right folder. That feels manageable.
But when you are releasing ten, twenty, or fifty designs a month, those five-minute blocks stack up fast. And that estimate almost always underestimates the real cost, because it does not account for the switching cost. Every time you interrupt your design work to handle mockup admin, you lose your creative momentum. You might be mid-flow on a new piece, then suddenly you are clicking through a dashboard to process the last batch. It fragments your day in ways that are hard to see clearly.
There is also the consistency problem. When mockup generation is a manual step, it is easy for it to slip. You finish a design late at night and tell yourself you will handle the mockup tomorrow. Tomorrow becomes three days later. Suddenly you have a backlog of designs sitting in limbo, not listed, not earning anything.
An automated trigger removes the dependency on your own discipline. The workflow runs because a file appeared, not because you remembered to start it.
What Automation Actually Looks Like in Practice
The system you are building works like this: you save a design file to a specific folder in Google Drive or Dropbox. That file landing in the folder is the trigger. An automation platform detects it, grabs the file URL, sends it to the Mockupanda API with your preferred settings, and the API returns finished mockup images. Those images can be automatically saved back to a folder, emailed to you, or pushed directly to another tool.
You do not have to be at your computer. You do not have to initiate anything. The design lands, the pipeline starts, and mockups come out the other end.
Actionable takeaway: Before you build anything, write down exactly how many designs you release per month and how many minutes per design you currently spend on mockup tasks. Multiply those together. That number is your baseline, and it is what you are about to reclaim.
Understanding the API Trigger Model Before You Build
What an API Actually Does in Plain Language
If the word API makes you want to close the tab, stay with me for a moment. An API is just a way for two pieces of software to talk to each other without a human in the middle. You send a request with some information attached, the other system processes it and sends something back.
In this context, you are sending a request to the Mockupanda API that says: here is my design file, here is the mockup template I want to use, here are my settings. The API processes that request and responds with URLs pointing to your finished mockup images.
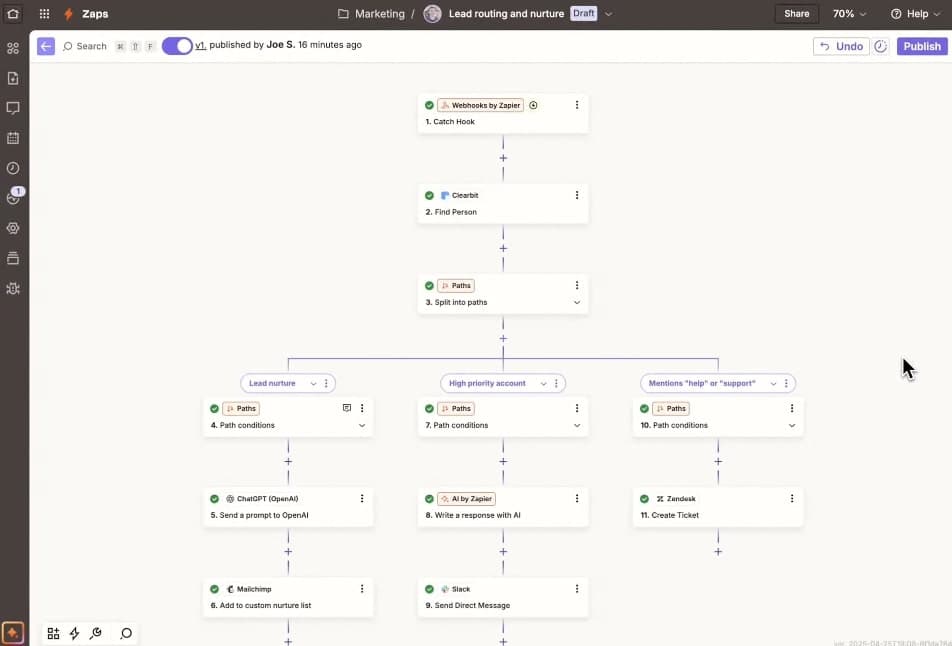
The automation platform, whether that is Make, Zapier, or something else, handles the job of watching your Drive or Dropbox folder and making that API call for you. You set up the instructions once. After that, the platform follows them every time a new file shows up.
You do not write code in the traditional sense. You build a visual workflow using blocks that represent actions: watch this folder, get this file, send this request, save this result.
Choosing the Right Automation Platform
The two most accessible options for this kind of workflow are Make (formerly Integromat) and Zapier. Both have free tiers that are generous enough to test your setup and handle moderate volume.
Make tends to be more flexible for complex workflows and is generally more affordable at scale. Its interface shows your workflow as a visual diagram of connected modules, which makes it easier to understand what is happening at each step.
Zapier is simpler and slightly more beginner-friendly for basic linear workflows, but it can get expensive quickly if you are processing a high volume of designs.
For this guide, the logic is the same regardless of which platform you choose. The steps might look slightly different in the interface, but the structure is identical.
Actionable takeaway: Sign up for a free Make or Zapier account before you go any further. Spend fifteen minutes clicking around the interface so it feels familiar before you start building your actual workflow.
Setting Up Your Google Drive or Dropbox Trigger
Structuring Your Design Folder Before You Connect Anything
Before you connect any automation, spend five minutes setting up a clear folder structure. This matters because your trigger is going to watch a specific folder. If that folder is disorganized, your workflow will be too.
A simple structure that works well:
One parent folder called something like `Designs - Incoming`
Subfolders organized by product type or collection if you work across categories
A separate folder called `Mockups - Completed` where finished images will land
The key is that your trigger folder should only receive files that are ready to process. Do not use a general dumping ground where you save work-in-progress files alongside finished designs. The automation does not know the difference. It will fire every time something lands in that folder, finished or not.
If you use Dropbox, you can also use Dropbox Paper or naming conventions to signal readiness, but a dedicated folder is the cleanest approach.
Connecting Your Cloud Storage to the Automation Platform
In Make or Zapier, the first step is setting up a trigger module. For Google Drive, you will use the "Watch Files" or "New File in Folder" trigger. For Dropbox, there is an equivalent "New File" trigger.
You will be asked to connect your Google or Dropbox account. This is a standard OAuth flow: you click connect, log in, grant permissions, and you are done. The platform never stores your password, it just receives a token that lets it watch your folder.
Once connected, you specify which folder to watch. Select your `Designs - Incoming` folder. Set the trigger interval, this is how often the platform checks for new files. On free plans this is typically every fifteen minutes. On paid plans you can get near-instant triggers.
At this point, your trigger is live. Any new file that lands in that folder will kick off whatever comes next in the workflow.
Actionable takeaway: Create your folder structure in Drive or Dropbox right now, before you open your automation platform. A clean starting point makes the rest of this much easier to reason about.
Building the API Call to Mockupanda
Getting Your API Credentials and Understanding the Request Structure
To make API calls to Mockupanda, you will need your API key. You can find this in your account settings once you are logged in. Treat this key like a password. Do not share it publicly or paste it into places where others can see it.
The basic structure of a mockup generation request involves a few key pieces of information:
Your API key for authentication
The URL of the design file you want to use
The ID of the mockup template you want to apply
Any additional parameters like output size or format
When your trigger fires in Make or Zapier, the platform gives you access to data about the new file, including its download URL. That URL is what you pass to the API as your design source.
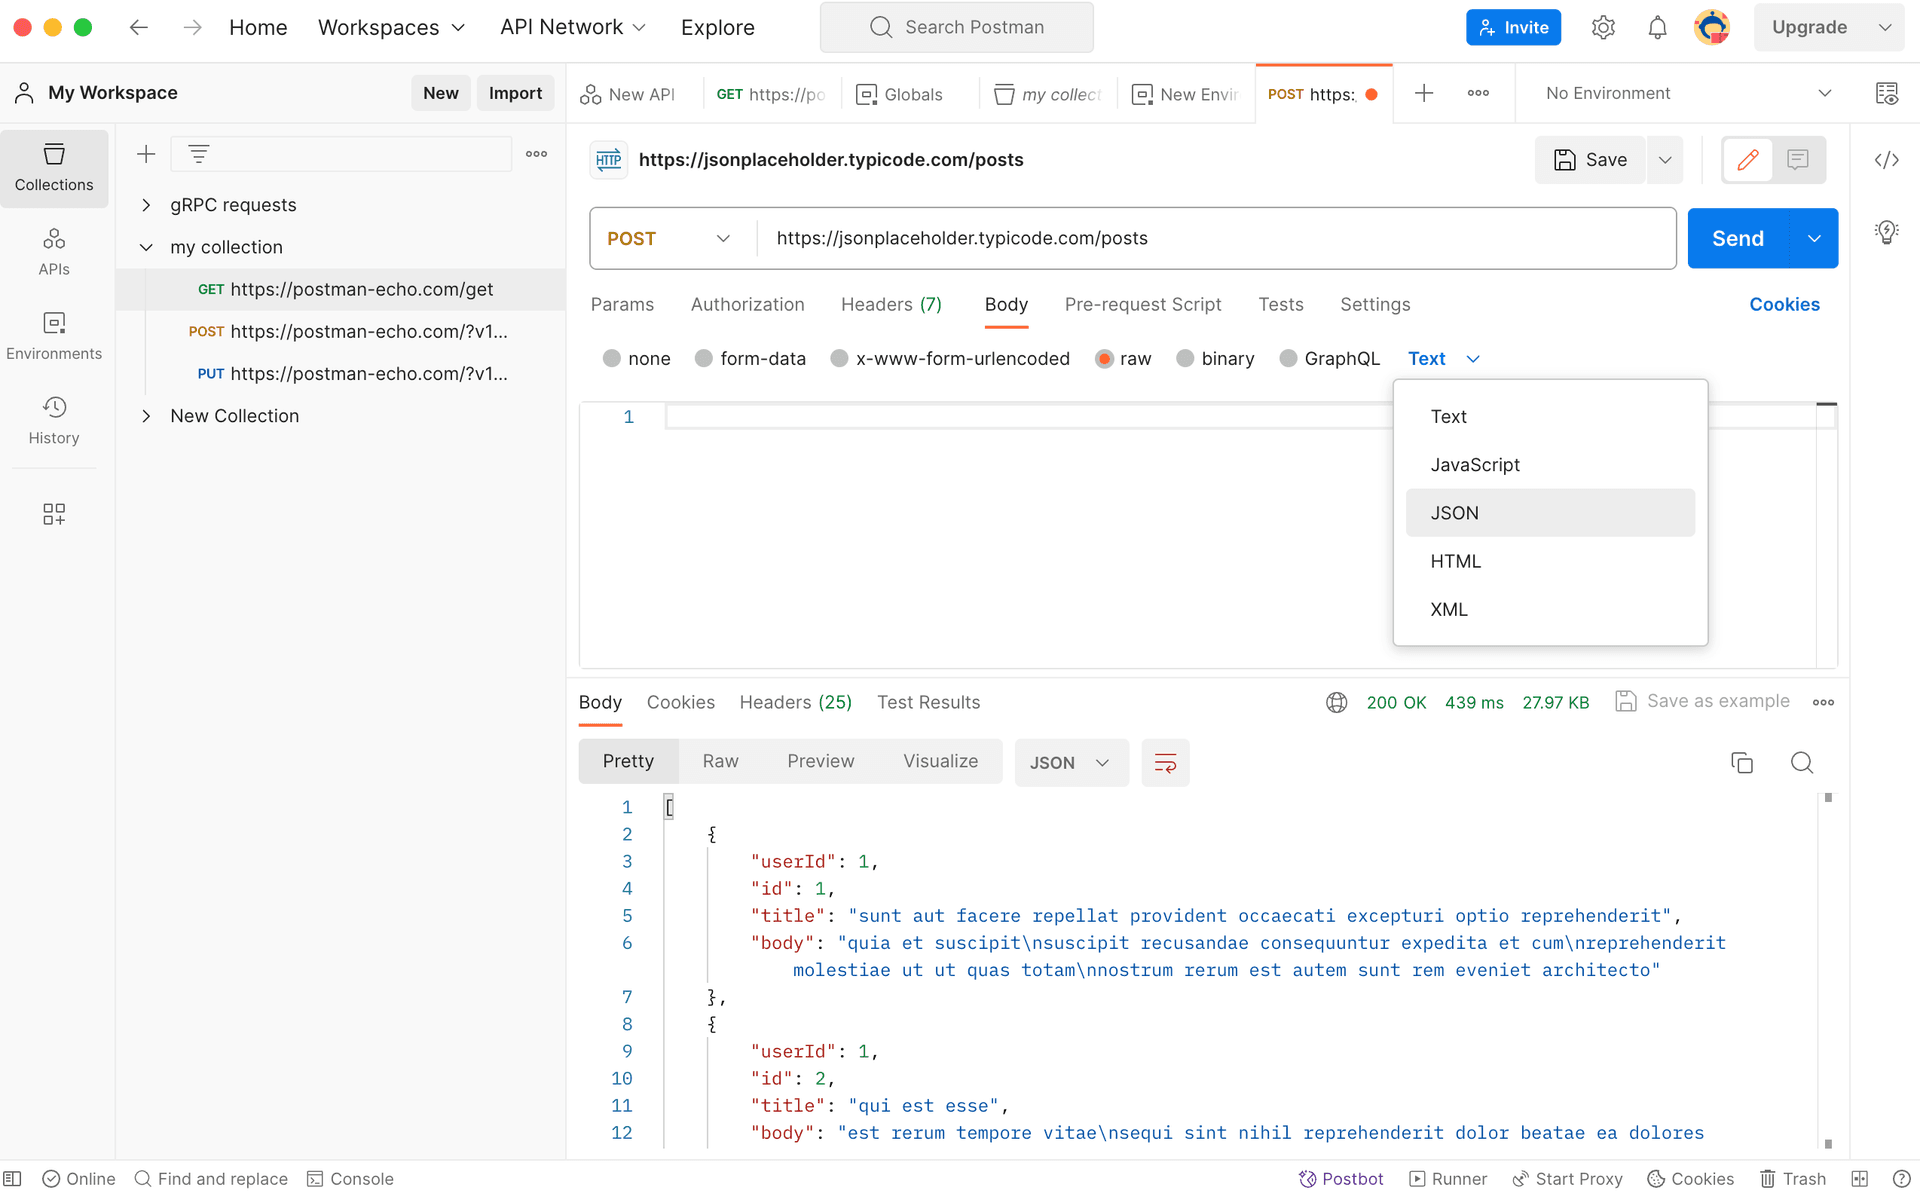
In your automation platform, after your trigger module, you add an HTTP request module. This is where you configure the actual API call. You set the method to POST, enter the Mockupanda API endpoint URL, add your API key to the headers for authentication, and build the request body with your file URL and template settings.
Make has a dedicated HTTP module that handles this cleanly. Zapier has a similar "Webhooks by Zapier" action for custom API calls.
Mapping the File URL from Your Trigger to Your API Request
This is the step where everything connects. Your trigger module captured the new file and has its URL available as a variable. In your HTTP request module, instead of typing a static file URL, you insert that variable.
In Make, this looks like clicking into the file URL field and selecting the output from your previous trigger module. The platform uses a templating system where you reference prior outputs using their module names and field names.
The result is a dynamic request: every time a new file triggers the workflow, its specific URL gets injected into the API call. The API receives a fresh request for each new design, processes it with your specified template, and returns the mockup.
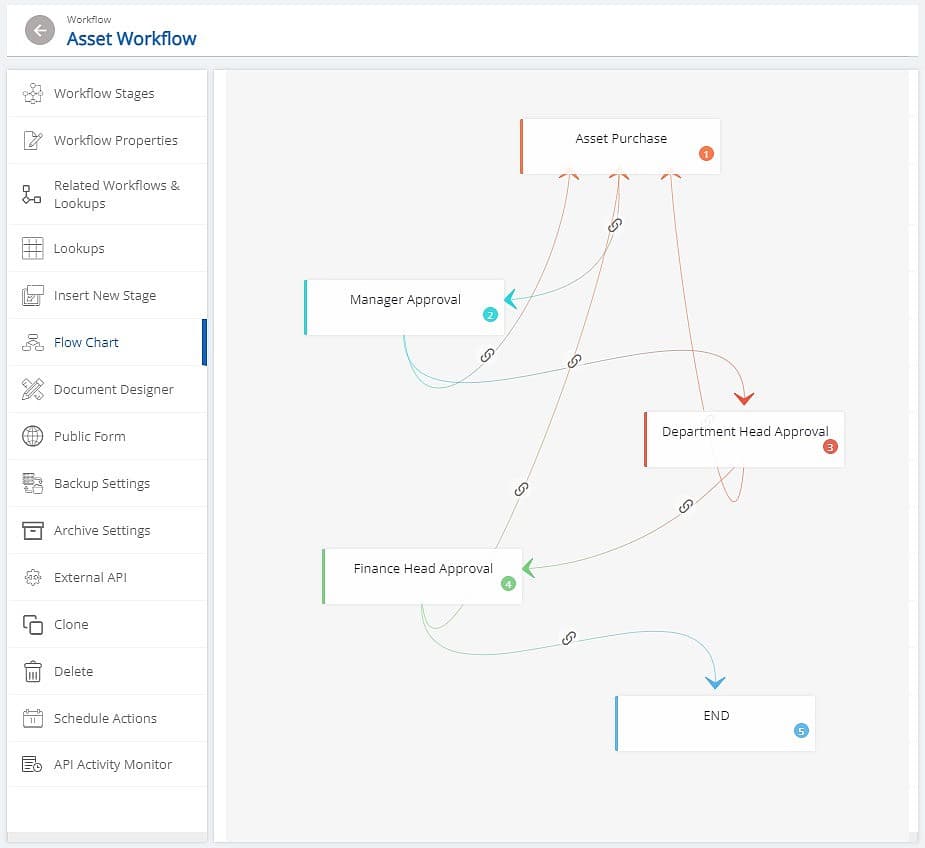
If you are releasing designs across multiple product types and want different templates for each, you can add a routing step before the API call. A filter or router module can check the file name or subfolder and direct it to a different API call with the appropriate template ID.
This is exactly the kind of flexibility that makes a well-built pipeline feel like it was designed specifically for your shop, because it was. The same logic that powers repeatable batch mockup workflows applies here, just fully automated rather than manually initiated.
Actionable takeaway: Before building the full workflow, test your API credentials by making a single manual request using a tool like Postman or the Make HTTP module directly. Confirm you get a successful response before wiring everything together.
Handling the Output and Saving Your Finished Mockups
Parsing the API Response and Extracting Image URLs
When the Mockupanda API returns a successful response, it comes back as a JSON object containing URLs to your finished mockup images. Your automation platform receives this response and makes its data available for the next step.
In Make, you can use a JSON parse module to extract specific fields from the response. You tell it which field contains your image URLs, and it makes those URLs available as variables for subsequent modules.
If your API call generates multiple mockup variations in a single request, the response will typically contain an array of URLs. You may need a loop or iterator module to handle each one individually in the steps that follow.
This sounds more technical than it is. In Make's visual interface, you are essentially drawing a line from the response data to the next action. The platform handles the extraction logic once you identify which field you need.
Saving Mockups Back to Drive or Dropbox Automatically
Once you have your mockup image URLs, you can do several things with them. The most straightforward option is to save them directly to your `Mockups - Completed` folder in Google Drive or Dropbox.
Add a Google Drive or Dropbox module after your image URL extraction step. Choose the "Upload File" action. Map the image URL from your API response to the file input field, set your destination folder, and configure a file naming convention.
A good naming convention includes the original design file name plus a template identifier and a timestamp. Something like `CosmicWallArt-FramedWhite-20240115.jpg` makes it easy to find the right mockup later without opening every file.
If you are also connecting your workflow to Shopify for automated listing creation, you can add further steps that take those mockup URLs and push them directly to a draft product. That is a longer workflow, but the foundation you are building here is exactly the piece that makes it possible.
You can also add a notification step. A simple email or Slack message that fires when new mockups are ready keeps you informed without requiring you to check a folder manually.
Actionable takeaway: Set up a naming convention for your output files before you build the save step. Consistent file names make every downstream task, from Etsy uploads to folder management, much faster.
Testing, Monitoring, and Scaling the Workflow
Running Your First Test End to End
Before you rely on this workflow for real production work, run it with a test file. Drop a sample design into your trigger folder and watch what happens.
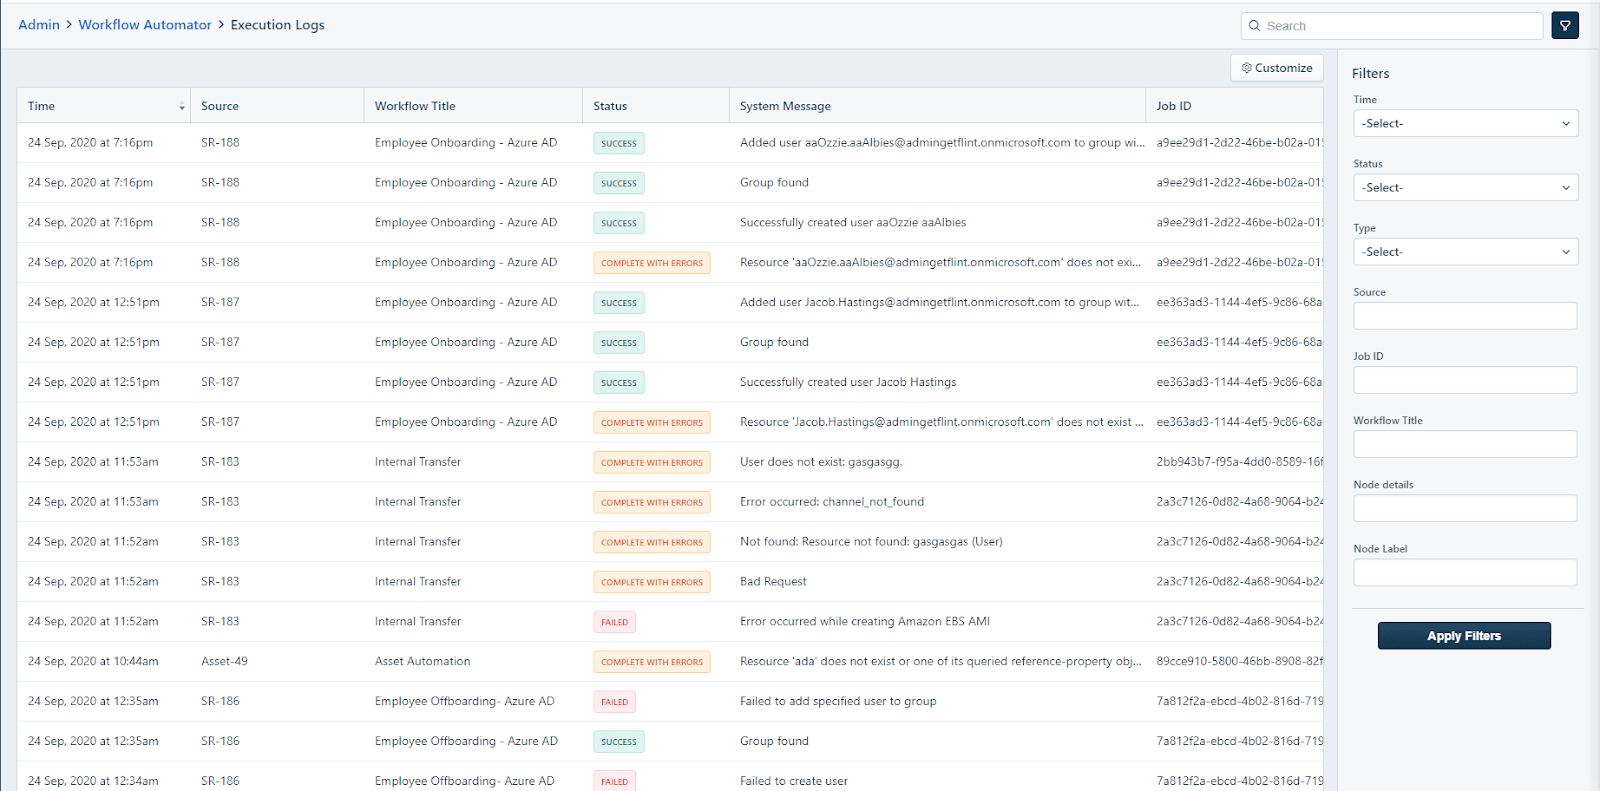
Most automation platforms have a run history or execution log where you can see exactly what happened at each step. Check that your trigger fired, that the API call went out with the correct file URL, that the response came back with image URLs, and that those images were saved to the right place.
If something breaks, the logs will tell you where. Common issues at this stage include incorrect file URL formats from the trigger, missing authentication headers on the API call, or response parsing that does not account for the actual structure of the API response.
Fix each issue one step at a time rather than trying to rebuild the whole thing. Automation debugging is mostly a process of isolating which module produced unexpected output and correcting just that piece.
For high-volume shops, the same kind of thinking that goes into batch creating mockups for large collections applies to testing automated pipelines. Start with a small batch to validate everything before you push volume through.
Monitoring the Workflow Over Time and Handling Errors
Once your workflow is live, you should not need to touch it regularly. But you do need to check in occasionally, especially in the first few weeks.
Set up an error notification in your automation platform. Both Make and Zapier can send you an email or message when a workflow execution fails. This is important because silent failures, where the trigger fires but something downstream breaks, can result in designs sitting unprocessed without you knowing.
Common reasons a running workflow might start failing: your API key gets rotated, your Google or Dropbox connection token expires, or a template ID you specified is no longer valid. None of these are catastrophic, but you need to know they happened so you can fix them quickly.
Also check your automation platform's task or operation usage monthly. Free tiers have limits, and depending on how many designs you release, you may need to upgrade to keep the workflow running smoothly. For most sellers releasing under a hundred designs a month, free tiers or low-cost plans are more than sufficient.
If you are scaling toward testing many new niches quickly, an automated trigger workflow starts paying for itself almost immediately in time saved, even before you factor in the improved consistency of your mockup output.
Actionable takeaway: Set up error notifications before you consider the workflow live. A workflow that silently fails is worse than no automation at all, because you will assume things are running when they are not.
Making the Workflow Work for Your Specific Shop Setup
Adapting for Multiple Product Types or Collections
If you sell across multiple product types, your single trigger folder can branch into multiple paths using routing logic. A router module lets you inspect the incoming file and send it down different paths based on criteria you define.
For example, you might have a naming convention where files starting with `WA-` are wall art and files starting with `DP-` are digital prints. Your router checks the file name, and each path makes a different API call with the template appropriate for that product type.
This is also useful for seasonal collections. When you are working on a holiday drop, you can route files tagged with a season identifier to templates that fit that aesthetic, without manually switching settings each time.
For sellers who work with designers or virtual assistants who deliver files to shared folders, this kind of routing logic can handle different contributors delivering different product types to the same folder without creating confusion.
Connecting the Output to Your Listing Workflow
The mockups your pipeline produces are only as useful as what you do with them next. The most time-efficient next step is to have a lightweight system for moving finished mockups into Etsy or Shopify listings quickly.
Some sellers keep a staging folder per listing. When a design's mockups land in the completed folder, they create a subfolder with the listing name and move everything there. All the assets for one listing live together, making the upload step straightforward.
Others integrate further, using the Mockupanda API output as part of a larger pipeline that touches their Shopify store directly. If that level of integration is interesting to you, the foundation you have built with your Drive or Dropbox trigger is the same foundation that pipeline sits on. You are adding steps, not starting over.
For Etsy specifically, you will still upload manually since Etsy does not offer a public API for listing creation the way Shopify does. But having mockups already generated, already named, and already sitting in an organized folder reduces that manual step to a straightforward upload task rather than a multi-step production process.
Actionable takeaway: Map out the three or four steps that happen after mockups are ready in your current workflow. Identify which of those could be reduced or eliminated by having better-organized output from your automation pipeline, and build that structure into your save step from the start.
Wrapping Up
Building this workflow takes a few hours the first time. After that, it runs quietly in the background every time you add a new design to your folder, returning finished mockups without requiring anything from you.
The real value is not just the time saved on any single mockup. It is the consistency. Every design gets processed the same way, with the same templates, the same naming conventions, the same output quality. That consistency compounds over time into a shop that looks coherent and professional across hundreds of listings, which is one of the clearest signals to buyers that you are a serious seller worth purchasing from.
If you have not already looked at what Mockupanda can do for your print-on-demand workflow, the API capabilities described in this post are just one part of a tool built specifically for sellers like you. Start with your folder structure today, connect your trigger this week, and let the workflow do the repetitive work so you can stay focused on designing.
Keep reading
The Batch Mockup Checklist Every Print-on-Demand Seller Needs Before a Holiday Sales Season

How to Use the Mockupanda API to Auto-Generate Mockups Every Time You Upload a New Design to Your Print-on-Demand Store