How to Batch Generate Mockups for an Entire Product Collection and Upload Them to Etsy in One Sitting

There is a specific kind of frustration that comes with launching a new product collection on Etsy. You have twenty, thirty, maybe fifty new designs ready to go. The art is done. The concept is solid. You are genuinely excited about this collection.
And then reality hits: you have to mockup every single one of them.
One by one. Adjust the placement. Export. Name the file. Repeat. By the time you get to design number twelve, the excitement has drained out completely and you are running purely on spite.
If that experience sounds familiar, this post is for you. I am going to walk you through a complete workflow for batch generating mockups across an entire product collection and uploading everything to Etsy in one focused sitting. Not spread across a week. Not a little each morning. One sitting.
This is the exact approach I built Mockupanda around, and it works whether you are launching a new shop, dropping a seasonal collection, or finally getting around to relisting that pile of designs you have been sitting on for months.
Why One-at-a-Time Mockup Creation Is Quietly Killing Your Momentum
Before getting into the workflow, it is worth understanding why the traditional approach is such a problem, because the fix only makes sense once you feel the weight of the problem.
The Compounding Time Cost
Creating a single listing mockup manually might take you five to ten minutes. That sounds manageable until you multiply it by forty designs. Suddenly you are looking at three to seven hours of repetitive clicking for one collection launch. And that is before you factor in the actual Etsy listing work: titles, tags, descriptions, pricing, categories.
When mockup creation takes that long, most sellers do one of three things. They rush and publish low-quality mockups that hurt conversions. They delay the launch and lose momentum. Or they burn out and abandon the collection entirely. None of those outcomes are good for your business.
The Inconsistency Problem
When you create mockups one at a time over several sessions, your collection ends up looking fragmented. Different lighting, different frame styles, different crops. Buyers scrolling through your shop see a visual mess instead of a cohesive brand. That inconsistency makes it harder to build the kind of polished shop aesthetic that justifies higher prices and earns repeat customers.
Batching solves this automatically. When you generate all your mockups in one session using the same templates, everything looks like it belongs together.
The Mental Overhead
Every time you sit down to create mockups individually, you have to make the same micro-decisions again. Which template? Which background color? What crop? That decision fatigue adds up, and it is completely unnecessary. A proper batch workflow eliminates those decisions by front-loading them once, then applying them across your entire collection automatically.
Takeaway: Calculate how long your current per-mockup process actually takes and multiply by your typical collection size. That number should motivate you to change your approach immediately.
Setting Up Your Collection Before You Touch a Mockup Tool
The biggest mistake sellers make when batch generating mockups is jumping straight into the tool before they have organized their files. Thirty seconds of chaos at the start turns into twenty minutes of confusion in the middle.
File Organization That Actually Works
Before you open any mockup software, create a dedicated folder for your collection. Inside it, create two subfolders: one called "designs" and one called "mockups." Every design file goes into the designs folder, named clearly and consistently. I use a simple convention like collection-name-design-title-01.jpg, but anything systematic works.
The key rule is this: every file that goes into your batch needs to be the same format and the same resolution. Most print-on-demand platforms and Etsy listings work best with high-resolution JPEGs or PNGs. If your files are a mix of sizes and formats, spend five minutes standardizing them before you start. A free tool like IrfanView or even Preview on Mac can batch resize and convert files in under a minute.
Decide Your Mockup Strategy for the Collection
Not every design needs the same number of mockups, but you should decide your standard before you start, not partway through. A good rule of thumb for digital print sellers on Etsy is three to five mockups per listing: one lifestyle shot showing the print in a styled room, one close-up showing detail and texture, and one or two neutral clean shots for buyers who want a clear view of the actual design.
Decide which templates you are going to use for this collection and stick to them. Consistency matters more than variety. Choose your templates based on the style of your designs and your target buyer, and then commit.
Takeaway: Before touching a mockup tool, spend ten minutes organizing your files and writing down exactly which templates you will use for this collection. Future you will be grateful.
The Batch Generation Workflow Using Mockupanda
This is the core of the whole process. A proper bulk mockup workflow should feel almost boring. That is the point.
Uploading Your Designs in Bulk
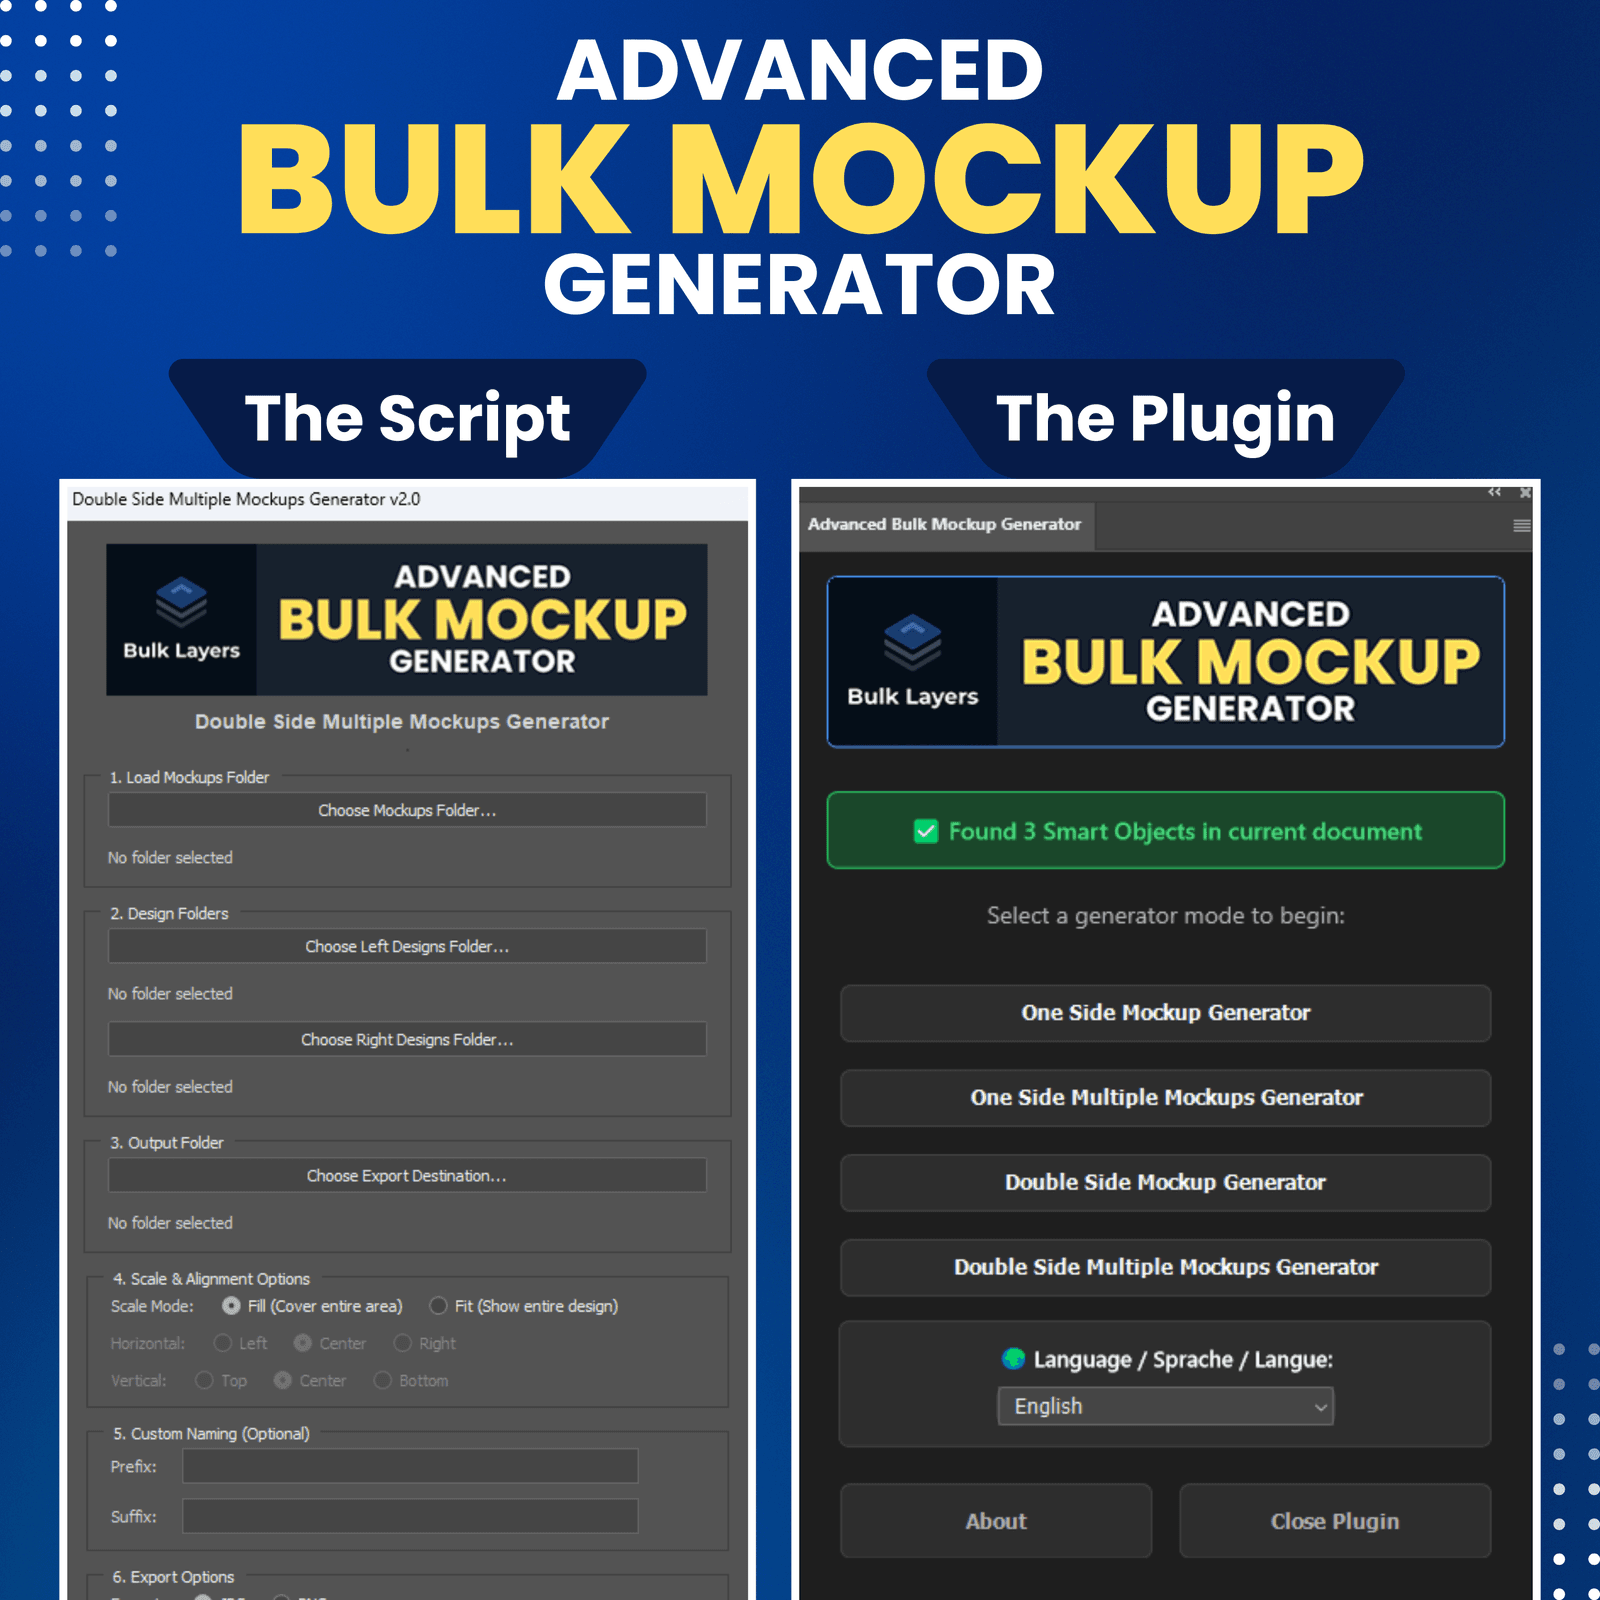
With Mockupanda, you upload your entire designs folder at once rather than one file at a time. Select all your design files, drop them in, and the tool processes them together. This alone eliminates the most tedious part of traditional mockup creation.
Once your designs are uploaded, you select the mockup templates you decided on in your prep step. The tool applies each design to each template automatically. If you have thirty designs and are using four templates per design, you end up with one hundred and twenty mockups generated in the time it would have taken you to manually create maybe six.
If you have not tried bulk mockup generation before, the speed of it is genuinely surprising the first time. It is one of those things that is hard to explain until you experience it.
Naming and Organizing Your Output Files
This step is easy to skip, and skipping it will cost you time during the Etsy upload phase. Set up your output file naming convention before you export. A clear convention like design-title-mockup-01, design-title-mockup-02, and so on keeps your mockups folder from turning into a chaotic numbered mess that you have to sort through manually.
Group your exported files by design, not by template. When you go to upload to Etsy, you will be working listing by listing, so having all four mockups for Design A together, then all four for Design B together, is far faster than having all Template 1 exports grouped together across all designs.
Quality Check Before You Move On
Do your quality check immediately after generation, while you are still in the mockup tool. Scroll through everything quickly and look for obvious problems: designs that are cropped badly, colors that look off, any templates where the placement looks wrong for a particular design's proportions.
Fix any issues now. If you save the quality check for later, you will be deep in the Etsy upload flow when you discover a problem, and switching back mid-process breaks your momentum.
Takeaway: Run your entire batch generation and quality check in one uninterrupted block. Do not start uploading to Etsy until every mockup is approved and properly named.
Preparing Your Listing Content in Parallel
Here is a workflow optimization that most sellers miss: your listing copy does not have to wait until your mockups are done. You can work on both in parallel.
Building a Listing Template
For a collection launch, most of your listings will have very similar structures. The title format is the same, the tags overlap significantly, the description covers the same key points about file formats, sizes, and usage rights. Build one master listing template in a Google Doc or Notion page before you start the upload session.
Your template should include: a title formula with blanks for the specific design name and style keywords, a description block that covers your standard terms and information, a tag bank of your best-performing collection-relevant tags, your pricing, and your category and shipping settings.
Having this template ready means you spend thirty to sixty seconds customizing each listing rather than writing from scratch.
Keyword Research Done Once, Applied Everywhere
If you are launching a collection with a shared theme, your keyword research applies across the whole batch. Do it once before you start uploading. Find your primary keywords for the collection theme and your secondary keywords for the individual design styles, then slot them into your template.
This is also a good time to prepare your pricing if you have not already. Pricing your digital prints correctly matters more than most sellers realize, and getting it right once for a collection is easier than second-guessing yourself on each individual listing.
Takeaway: Write your listing template and do your keyword research before you open Etsy. Arriving at the upload step with your copy already prepared cuts your per-listing upload time dramatically.
The Etsy Upload Session
With your mockups organized and your listing template ready, the upload session itself should feel like a production line rather than a creative process.
Working Listing by Listing Without Losing Your Place
Open your mockups folder and your listing template side by side. Work through one design at a time: upload the mockups for Design A, fill in the customized title and description from your template, add your tags, set your price, and publish or save as draft. Then move to Design A's mockup folder and delete or move those files so you always know exactly where you are in the batch.
Do not try to multitask during this phase. The upload session works because you have front-loaded all the creative decisions. Now you are executing, and execution works best when it is focused and sequential.
Using Etsy's Draft Feature Strategically
If you are uploading a large collection, consider saving everything as drafts first, then publishing all at once. This has a couple of advantages. It lets you get through the upload work quickly without worrying about whether each listing looks right on the live shop. It also lets you review everything together before it goes public, catching any inconsistencies in your titles or pricing across the collection.
Some sellers also prefer staggered publishing for SEO reasons, believing that Etsy's algorithm gives a small boost to new listings. If that is your strategy, the draft approach lets you upload everything in one sitting and then publish on a schedule.
The Final Consistency Check
Before you publish the collection, do one pass through all your new drafts with fresh eyes. Check that your mockup thumbnails look consistent across all listings when viewed as a grid. Check that your titles follow the same format. Make sure your pricing is consistent for comparable items.
This check takes five to ten minutes and is absolutely worth it. A polished, consistent collection gives buyers confidence and makes your shop look established and professional, which directly supports higher prices and better conversion rates.
Takeaway: Treat the upload session as execution, not creation. Have everything ready before you start, work through listings sequentially, and do a final review pass before publishing.
Building This Into a Repeatable System
Doing this workflow once is good. Having it as your standard process for every collection launch is transformative.
Documenting Your Process
After your first successful batch-and-upload session, spend fifteen minutes writing down exactly what you did. What folder structure worked? Which templates did you use and why? What naming convention made the Etsy upload easiest? What would you do differently?
This documentation becomes your launch playbook. The next time you have a new collection ready, you are not reinventing your process. You are running a system. That consistency compounds over time, letting you launch new designs faster with each iteration.
Scaling the System as Your Shop Grows
Once you have the core workflow dialed in, you can start extending it. Add a brand review step if you bring in other people to help. Create a mockup template library organized by collection theme so you can quickly pull the right styles for a seasonal drop. Set up a launch calendar that schedules your batch sessions in advance rather than reacting whenever designs are ready.
The sellers who scale successfully on Etsy are not necessarily the most creative or the ones with the best designs. They are the ones who build repeatable systems that let them operate at high volume without high stress.
Takeaway: Document your workflow after your first successful batch session and treat it as a living document you refine with each launch. The goal is a system you can run on autopilot.
The Real Payoff: More Launches, Less Burnout
The reason I built Mockupanda was because I kept watching talented sellers with genuinely great designs underperform on Etsy, not because their products were bad, but because they could not keep up with the operational side of running a shop at scale. Mockup creation was almost always part of that bottleneck.
When you collapse the mockup-to-listing pipeline into a single focused session, a few things change. You launch more often because launching is no longer exhausting. You maintain better visual consistency because you are working on the whole collection at once rather than piecemeal. You free up mental energy for the parts of your business that actually require creativity, like designing new products and building your brand.
A collection that took you a week to list because the mockup work kept stalling can realistically be live within a single working day using a proper batch workflow. That is not a marginal improvement. That is a fundamentally different way of running your shop.
If you have a pile of designs waiting to become listings, today is a good day to run through this workflow for the first time. Pick a small collection, even just ten or fifteen designs, and take it from raw files to published listings in one session. The experience of doing it once tends to make the next launch feel significantly less daunting.
Keep reading

How to Use Batch Mockup Generation to Stay Consistent When You Have Multiple Designers Uploading New Artwork to Your Shop
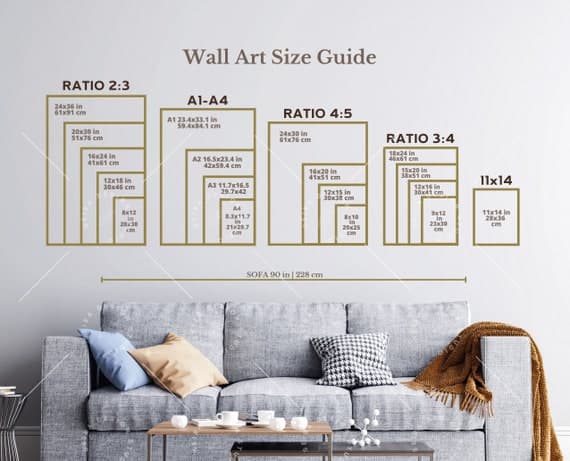
How to Create Mockups for 10 Print Size Variants of the Same Design in One Batch Without Starting Over Each Time