The Non-Developer's Guide to Setting Up a Poster Mockup API Integration Without Writing a Single Line of Code
There is a common assumption floating around the print-on-demand world: APIs are for developers. If you do not know how to write code, you just skip the API section of any tool and figure out a manual workaround instead.
But that assumption is costing you hours every week.
The truth is that a poster mockup API, paired with a no-code automation platform, is one of the most powerful time-saving setups available to Etsy sellers and print-on-demand shop owners right now. And you absolutely do not need to write a single line of code to make it work.
This guide is going to walk you through the whole thing, from understanding what an API actually does in plain English, to connecting it to your workflow using tools designed for non-technical people. By the end, you will have a clear path to automating your mockup creation so that every new design you upload generates a professional, ready-to-list image automatically.
What a Poster Mockup API Actually Does (In Plain English)
Before diving into the setup, it helps to understand what you are actually working with. The word "API" tends to make people's eyes glaze over, but the concept is genuinely simple.
Think of It Like a Vending Machine
An API is basically a way for two pieces of software to talk to each other. You send a request, and the software sends something back.
With a poster mockup API, the request you send is: "Here is my design file. Please place it inside this mockup frame and send me back the finished image." That is it. The API takes your design, drops it onto a pre-built mockup template (a framed print hanging on a wall, a gallery-wrapped canvas, a linen-textured poster), and returns a polished, professional product image.
What makes this powerful is that it happens automatically, in seconds, every time you trigger it. No opening Photoshop. No dragging and dropping. No exporting. The whole process runs in the background while you do something else.
Why This Matters for Your Etsy Shop
If you are listing new designs regularly, the time you spend creating mockups manually adds up fast. Even at five minutes per listing, ten new designs a week costs you nearly an hour of repetitive work. Multiply that across a year and you are looking at days of your life spent doing something a computer could handle for you.
Beyond time savings, automated mockups mean consistency. Every image comes out at the same quality, same framing, same professional finish. That consistency builds trust with buyers and helps your listings stand out in a competitive feed.
Mockupanda was built specifically around this problem. The API is designed to be straightforward enough that sellers without technical backgrounds can connect it to their workflow using the no-code tools covered in this guide.
Takeaway: An API is just a messenger. You send your design, it sends back a finished mockup. The goal of this guide is to show you how to set up that conversation automatically, without writing any code yourself.
The No-Code Tools You Need to Know About
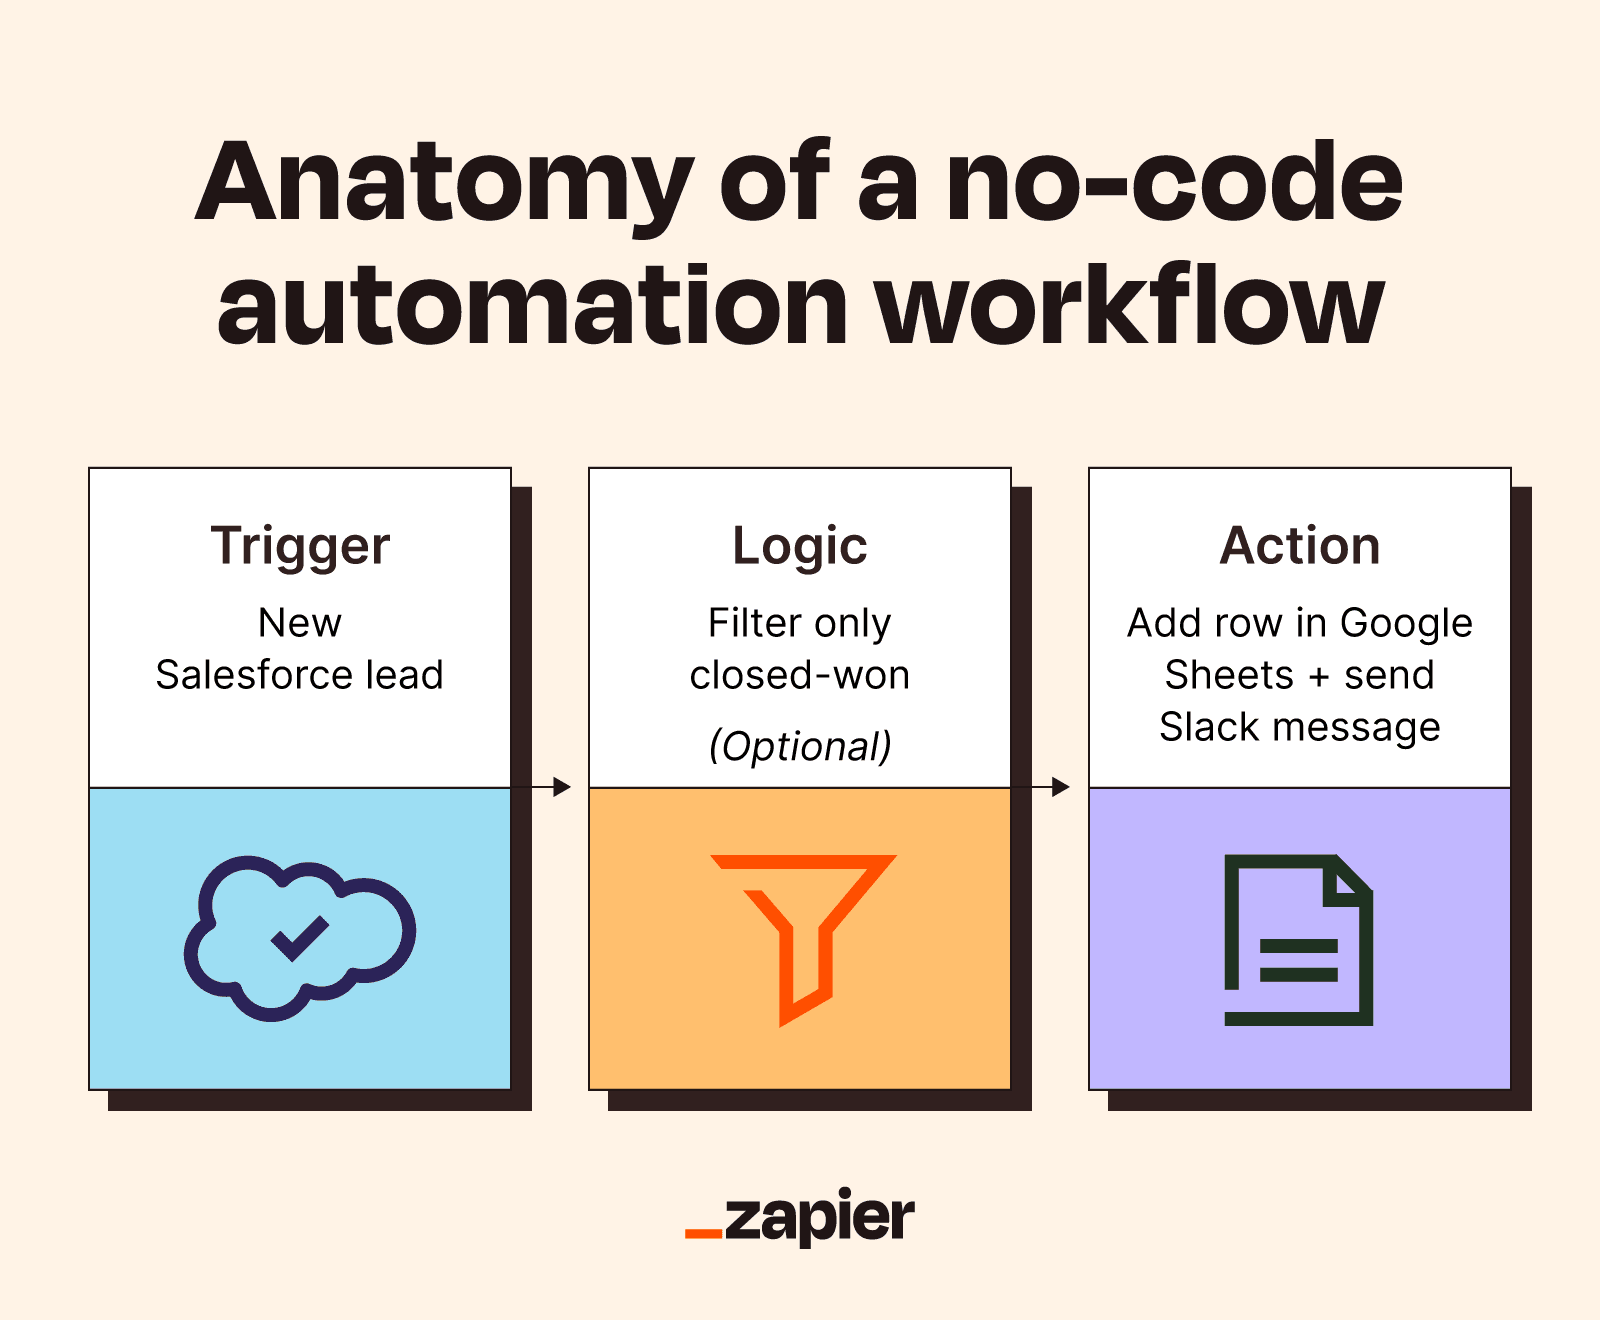
To connect a mockup API to your workflow without coding, you need a middleman: a no-code automation platform. These platforms let you build automated workflows, called "zaps" or "scenarios," using a visual drag-and-drop interface.
Zapier
Zapier is the most widely used no-code automation tool, and it is a great starting point if you have never done anything like this before. It connects thousands of apps using a simple trigger-and-action structure.
A trigger is something that happens, like a new file appearing in a Google Drive folder. An action is what happens in response, like sending that file to the mockup API and getting an image back.
Zapier has a free tier, and many basic automation setups for print-on-demand sellers will work within those limits. Paid plans unlock more steps per workflow and higher task volumes, which becomes relevant once you are generating mockups at scale.
Make (Formerly Integromat)
Make is the other major player in this space, and many print-on-demand sellers prefer it for more complex setups because it gives you more visual control over how data flows between steps. It also tends to be more affordable at higher volumes.
Make uses a visual canvas where you can see each step of your workflow laid out as connected modules. It is slightly more involved to learn than Zapier, but not by much, and the extra flexibility pays off once you want to do things like rename files automatically, loop through multiple designs in one run, or route different design types to different mockup templates.
Which One Should You Choose?
If you are brand new to automation, start with Zapier. The interface is friendlier, the documentation is clearer for beginners, and you can get a working mockup workflow running in under an hour. Once you have a feel for how automation works, you can explore Make for more advanced setups.
Both tools have a free trial or free tier, so you are not committing to anything financially while you figure out which one fits your workflow.
Takeaway: Pick Zapier to start. Get one workflow running. You can always graduate to Make later when you want more control over how your automation behaves.
Setting Up Your First Mockup Automation: Step by Step
Here is a practical walkthrough of how to connect a poster mockup API to a simple trigger, using a Google Drive folder as the starting point. This is one of the most common setups for print-on-demand sellers.
Step 1: Get Your API Key from Mockupanda
Your API key is like a password that tells the mockup service "this request is coming from my account." You will find it in your Mockupanda account settings under the API section.
Copy the key and paste it somewhere safe, like a notes app or a password manager. You will need to paste it into your automation tool in a moment.
While you are in your account, also spend a few minutes looking at the available mockup templates. Note the template IDs for the frames or wall art styles you want to use most often. These IDs tell the API which mockup to place your design into, so knowing them before you build the workflow saves you from having to go back and find them later.
Step 2: Create Your Trigger in Zapier or Make
In Zapier, click "Create Zap" and choose your trigger app. If you are using Google Drive, select Google Drive and set the trigger event to "New File in Folder." Point it at the specific folder where you will drop new design files.
In Make, create a new scenario and add a Google Drive module set to "Watch Files in a Folder." Same idea, just a slightly different interface.
This trigger step means that every time a new file lands in that folder, your automation wakes up and runs the next steps automatically. You can read more about exactly how this trigger-based approach works for design approvals and file syncing in this walkthrough on automatic mockup generation from Google Drive or Dropbox.
Step 3: Add an HTTP Request Step to Call the Mockup API
This is the step that actually sends your design to the mockup API. In both Zapier and Make, there is a built-in module called something like "Webhooks" or "HTTP Request" that lets you make a call to any API without writing code.
Here is what you fill in:
URL: The endpoint URL from Mockupanda's API documentation (something like `https://api.mockupanda.com/v1/mockups`)
Method: POST (you are sending data, not just retrieving it)
Headers: Add an Authorization header with your API key in the format specified in the documentation
Body: This is where you include the URL of your design file and the template ID you want to use
The file URL is important. Rather than uploading the file directly, APIs typically work with a URL pointing to where the file lives online. If your design is in Google Drive, you can grab its shareable link. Some automation setups use a file hosting step in between to make sure the URL is accessible.
Step 4: Capture the Output and Send It Somewhere Useful
Once the API processes your request, it sends back a response that includes the URL of your finished mockup image. Your automation captures this response, and then you can do whatever you want with it.
Common next steps include:
Saving the mockup image to a Google Drive folder called "Ready to List"
Uploading it directly to your Shopify product listing using the Shopify module in Zapier or Make
Sending yourself a Slack or email notification with the image attached so you know it is ready
Logging the design name and mockup URL into a Google Sheet for easy tracking
For sellers who want to go further and connect this directly to Shopify so new product images appear automatically, the process of connecting a mockup API to your Shopify store follows the same structure with a Shopify action added at the end.
Takeaway: The whole workflow is: trigger (new file) sends design to API (HTTP request step) returns finished mockup (save or upload). Most non-technical sellers can build this in under two hours on their first attempt.
Common Mistakes Non-Developers Make and How to Avoid Them
Even with no-code tools making this accessible, there are a few places where things commonly go sideways. Knowing about them in advance will save you a lot of frustration.
Mistake 1: Using a File That Is Not Publicly Accessible
APIs generally cannot open files that are locked behind a login or set to private. If you share your design from Google Drive with the default "restricted" setting, the API will not be able to read it.
The fix is simple: make sure any file you send to the API is either publicly accessible or hosted somewhere the API can reach it. In Google Drive, set the share settings to "Anyone with the link can view." Alternatively, use a step in your automation that uploads the file to a public hosting service like Cloudinary or Amazon S3 first, then pass that URL to the API.
Mistake 2: Not Reading the API Response Before Moving On
A lot of first-time automation builders set up the trigger and the API call, then add the next step assuming the response will always be perfect. In reality, if the API returns an error (maybe the file URL was broken, or the template ID was wrong), your automation will try to use a blank or missing image in the next step.
Add a filter step after your API call that checks whether the response status is successful before continuing. Both Zapier and Make let you add conditional logic that only proceeds if the request was successful.
Mistake 3: Sending Too Many Requests at Once
If you have a folder with fifty designs and you trigger the automation all at once, you may hit rate limits on the API. Rate limits are caps on how many requests you can send per minute or per hour, and exceeding them will cause some of your requests to fail.
The easy fix is to use a delay step between each API call when processing bulk uploads, or to upload designs in smaller batches. Check the API documentation for the rate limit details so you know what you are working with.
Takeaway: Before you run your automation on a big batch of files, test it on one file first. Make sure the output looks right, the file URL is accessible, and the response is being captured correctly. Then scale up.
How to Handle Multiple Mockup Styles for the Same Design
One of the things that makes Mockupanda genuinely useful for Etsy sellers is the ability to generate multiple mockup styles from a single design file. A framed print, a gallery wall arrangement, a linen poster hanging in a bedroom. Each style gives buyers a different way to visualize the piece in their home, which directly impacts conversion rates.
With a no-code automation, you can set this up so a single trigger generates three or four different mockup images automatically.
Using a Loop or Multiple API Call Steps
In Make, you can use a repeater or iterator module to loop through a list of template IDs and send the same design to each one in sequence. The result is multiple finished mockup images, all generated from a single upload.
In Zapier, you can achieve something similar by adding multiple HTTP request steps in a row, each pointing to a different template ID. It is a little less elegant than a loop, but it works well for a fixed number of mockup styles.
Organizing Your Output by Style
When you are generating multiple mockups per design, it helps to have a naming convention built into your automation. Use the design file name plus the template name as the output file name, so your "Ready to List" folder stays organized. Something like `coastal-sunset-print-framed-oak.jpg` and `coastal-sunset-print-linen-poster.jpg` is much easier to work with than a folder full of numbered files.
Takeaway: Build your multi-mockup workflow by first getting a single mockup working, then duplicating the API call step and changing the template ID. Start simple, then layer in the extra styles once the basics are solid.
What Comes After Your First Workflow Is Running
Once you have a basic mockup automation running, the natural question is: what else can I connect to this?
The sellers who get the most out of no-code automation tend to layer things gradually. First they automate mockup creation. Then they connect it to their listing workflow. Then they add notifications or approval steps. Eventually the whole process from new design file to live product listing runs with almost no manual involvement.
Connecting to Your Listing Workflow
If you sell on Shopify, the next logical step is connecting your mockup automation to automatic product listing creation. Your automation can take the finished mockup images and upload them directly as product images, so new listings go live with professional photos already attached.
For high-volume shops that launch many products at once, building toward what some sellers call a zero-touch mockup pipeline means the gap between "design finished" and "product live" shrinks from hours to minutes.
Tracking Performance and Iterating
Keep a simple log of which mockup styles perform best for each product category. After a few months of automated mockup generation, you will have enough data to know whether your botanical prints convert better with an oak frame or a black frame, whether your minimalist designs sell more with a lifestyle bedroom shot or a clean white wall background.
Use that data to refine which template IDs you include in your automation. The goal is not just to save time, it is to generate the right mockups automatically, the ones that actually convert browsers into buyers.
Takeaway: Treat your first workflow as a foundation, not a final product. Get it running, let it collect some real-world data, then improve it based on what you learn.
You Do Not Have to Be Technical to Work Smarter
The print-on-demand sellers who are growing fastest right now are not necessarily the most talented designers or the best marketers. A lot of them are simply the ones who figured out how to remove repetitive manual work from their process earlier than everyone else.
Setting up a poster mockup API integration without writing any code is genuinely within reach if you can use a spreadsheet and follow a step-by-step workflow. The tools exist. The documentation is there. And the time you save compounds every single week.
If you have been putting this off because it sounded too technical, this is your sign to give it a proper try. Start with a single Zapier workflow, one trigger, one API call, one output. Get that working. Then build from there.
Mockupanda was built by a product designer who understands the print-on-demand workflow from the inside, which is why the API is designed to be practical and straightforward rather than over-engineered. The goal is to save you time and help your listings look more professional, not to add another complicated tool to your plate.
Give it a try. Your future self, the one who is not spending Sunday afternoons manually creating mockups, will thank you.
Keep reading
The Complete Etsy Mockup Generator Comparison: What to Look for When You're Selling Digital Prints at Scale

How to Use Batch Mockup Generation to Stay Consistent When You Have Multiple Designers Uploading New Artwork to Your Shop