How to Create Mockups for 10 Print Size Variants of the Same Design in One Batch Without Starting Over Each Time
If you sell digital wall art or physical prints, you are probably listing the same design in multiple sizes. Maybe you offer 5x7, 8x10, 11x14, 16x20, and 24x36. That is five listings, each needing at least three or four mockup images to compete in search results. Do the math and you are looking at 15 to 20 mockup images per design, every single time you add something new to your shop.
Most sellers handle this by opening their mockup tool, uploading their design, exporting, then starting the whole process over for the next size. It is repetitive, slow, and honestly demoralizing when you have a backlog of 30 designs sitting there waiting to go live.
There is a better way to think about this, and it starts with treating your size variants as a group rather than individual tasks. This post walks you through a practical system for generating mockups across all your print size variants in a single session, without losing your mind or your afternoon.
Why Print Size Variants Are a Unique Mockup Problem
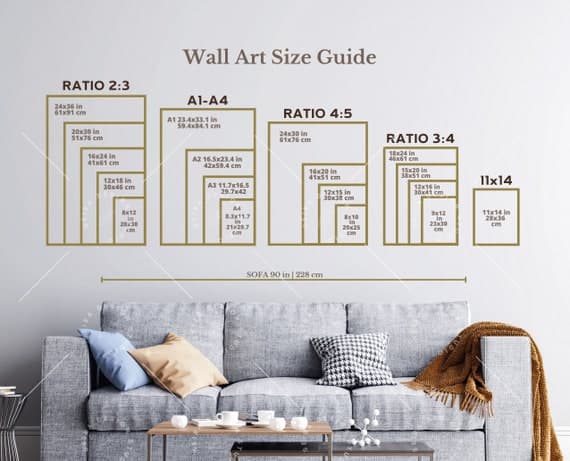
Selling prints in multiple sizes is not like selling the same t-shirt in different colors. The proportions actually change. An 8x10 is a 4:5 ratio. An 11x14 is roughly 4:5 as well but with slightly different dimensions. A 5x7 is a 5:7 ratio. A 16x20 is also 4:5. Some of these can share the same mockup template, but others will look distorted if you try to force them into a frame designed for a different aspect ratio.
This is where a lot of sellers get tripped up. They pick one beautiful mockup frame and try to apply it to every size variant, then wonder why some prints look stretched or why the margins look weird inside the frame.
Aspect Ratio Groups Are Your Best Friend
Before you even open a mockup tool, sort your print sizes into aspect ratio groups. This single organizational step is what makes batching possible.
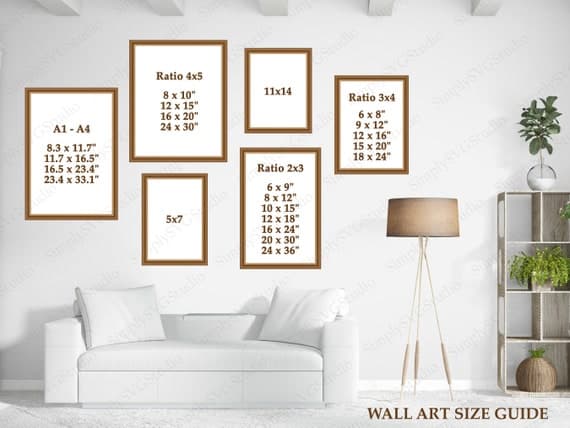
Here is a quick reference:
4:5 ratio: 8x10, 16x20, 24x30
5:7 ratio: 5x7, 10x14
2:3 ratio: 4x6, 8x12, 12x18, 20x30
11:14 ratio: 11x14 (unique, needs its own template)
Square: 8x8, 12x12, 16x16
Once you know your ratio groups, you can assign one set of mockup templates to each group. Every 4:5 design uses the same frames. Every 2:3 design uses its own set. You are no longer treating ten sizes as ten separate jobs. You are treating them as three or four groups, each batched together.
Takeaway: Before you start any mockup session, list out your print sizes and group them by aspect ratio. This turns a ten-step process into a three-step one.
The Real Cost of Starting Over Each Time
Let's be honest about what "starting over" actually costs you. If it takes you four minutes to produce one mockup image from scratch, and you have ten size variants each needing four mockup images, that is 160 minutes per design. For a shop that adds two new designs a week, that is over five hours every single week spent on mockups alone.
Now imagine cutting that by 70 percent because you are batching by ratio group and reusing templates intelligently. Suddenly you are spending an hour and a half instead of five hours, and that time difference compounds every week, every month, and across every design you ever add to your shop.
This is exactly the kind of repetitive, high-volume problem that a dedicated batch mockup tool is built to solve, versus a general-purpose design tool that makes you recreate everything by hand.
Takeaway: Calculate your real weekly mockup time before optimizing. Once you see the number, you will be far more motivated to build a smarter system.
Setting Up Your Template Library Before You Batch
The reason most sellers start over every time is that they have no template system in place. They wing it each session. A template library is what separates a chaotic mockup process from a smooth one.
What Belongs in a Good Template Library
For print-on-demand sellers, a useful template library includes:
At least two to three mockup frames or scenes per aspect ratio group
A mix of styled room scenes and simple flat frames, so you have options for different listing images
Templates that match your brand aesthetic, so your shop looks cohesive across all listings
Naming conventions that make it obvious which template belongs to which ratio group
You do not need dozens of templates to start. Three solid frames per ratio group is enough. If you sell in four ratio groups, that is twelve templates total. That is a manageable library that covers every size you offer.
When you use Mockupanda for this, you can save and reuse template configurations so that once you have set up your ratio groups, you can apply them to any new design in seconds rather than rebuilding from scratch each time.
How to Name and Organize Your Templates
This sounds boring but it matters enormously when you are moving fast. A naming convention like this works well:
`frame-4x5-minimal-white`
`frame-4x5-boho-living-room`
`frame-2x3-gallery-wall`
`frame-square-modern-bedroom`
When you sit down to batch mockups for a new design, you pull up all templates labeled `4x5` for your 8x10 and 16x20 variants, then switch to your `2x3` templates for your 12x18 variants. No hunting, no second-guessing.
Store these in a dedicated folder on your computer or cloud drive, labeled clearly. If you work with a virtual assistant or plan to scale up, this organization is what makes delegation possible.
Takeaway: Build your template library before your next batch session. Even a basic set of two templates per ratio group will save you significant time immediately.
The Actual Batch Workflow, Step by Step
Here is how a smart batch mockup session works for a seller with ten print size variants of the same design.
Step 1: Prepare All Your Design Files First
Before opening any mockup tool, export your design file at the correct resolution and dimensions for every size you are listing. Many sellers skip this step and try to use one file for everything, then wonder why some mockups look soft or pixelated.
For digital prints sold as high-resolution files, your exports should typically be at 300 DPI at the actual print dimensions. For mockup purposes, you often do not need the full print-resolution file, but you do need the right aspect ratio for each size group.
Prepare one master export per ratio group:
One 4:5 crop of your design
One 5:7 crop
One 2:3 crop
One square crop if applicable
This is typically a ten-minute task in Photoshop, Lightroom, or even Canva. Do it all at once before your mockup session begins.
Step 2: Batch by Ratio Group, Not by Individual Size
Now open your mockup tool and work through one ratio group at a time. Take your 4:5 design file and apply it to every template in your `4x5` template library. Export all of those at once. Then move to your 2:3 design file and apply it to your `2x3` templates.
This is a fundamentally different rhythm from the old approach of doing one size, exporting, then starting fresh. You are staying in one ratio group until every mockup for that group is done, then switching.
For sellers running high-volume print-on-demand shops, this grouped approach is the difference between spending a morning on mockups versus an entire day.
Step 3: Export With Descriptive File Names
When you export, name your files in a way that tells you exactly which listing they belong to. Something like:
`botanical-print-8x10-frame-white-room.jpg` `botanical-print-16x20-gallery-wall.jpg` `botanical-print-12x18-minimal-frame.jpg`
This seems like a small thing but it will save you from digging through a folder of `mockup_final_FINAL_v2.jpg` files when you are uploading to Etsy at midnight.
Takeaway: Work in ratio groups, not individual sizes. Export all templates for one ratio before moving to the next. Name files as you go so upload time is painless.
Handling the Sizes That Do Not Fit Neatly Into Groups
Some sizes are awkward. 11x14 is one of the most popular print sizes and it does not share an aspect ratio cleanly with anything else. Same with A-series sizes like A4 and A3 that European buyers often request.
Build Dedicated Templates for Outlier Sizes
For these outlier sizes, build two dedicated templates rather than trying to squeeze them into a group. Because you have a template ready, you are still not starting from scratch. You are just applying a dedicated template instead of a group template.
If 11x14 is a significant part of your sales, it is worth having three or four good templates specifically for it. Treat it as its own small ratio group.
When Cropping Is Not Appropriate
Some designs genuinely do not crop well into every aspect ratio. A landscape composition that works beautifully as a 16x20 might not work as a 5x7. Rather than forcing it, be selective about which sizes you actually offer for each design.
Not every design needs to be available in ten sizes. Offering the right five sizes for a given composition is better than offering ten sizes where three of them look awkward. This also means fewer mockups to create, which is a practical benefit on top of the quality one.
Takeaway: For awkward aspect ratios like 11x14, build dedicated templates rather than improvising. And be willing to offer fewer sizes when a design does not crop well across all formats.
Keeping Your Mockup Style Consistent Across All Sizes
One of the things buyers notice without realizing it is whether a shop looks cohesive or thrown together. When your 8x10 mockup looks like it came from a different shop than your 16x20 mockup, it undermines trust and makes your listings feel less professional.
Match Frames and Room Styles Across Sizes
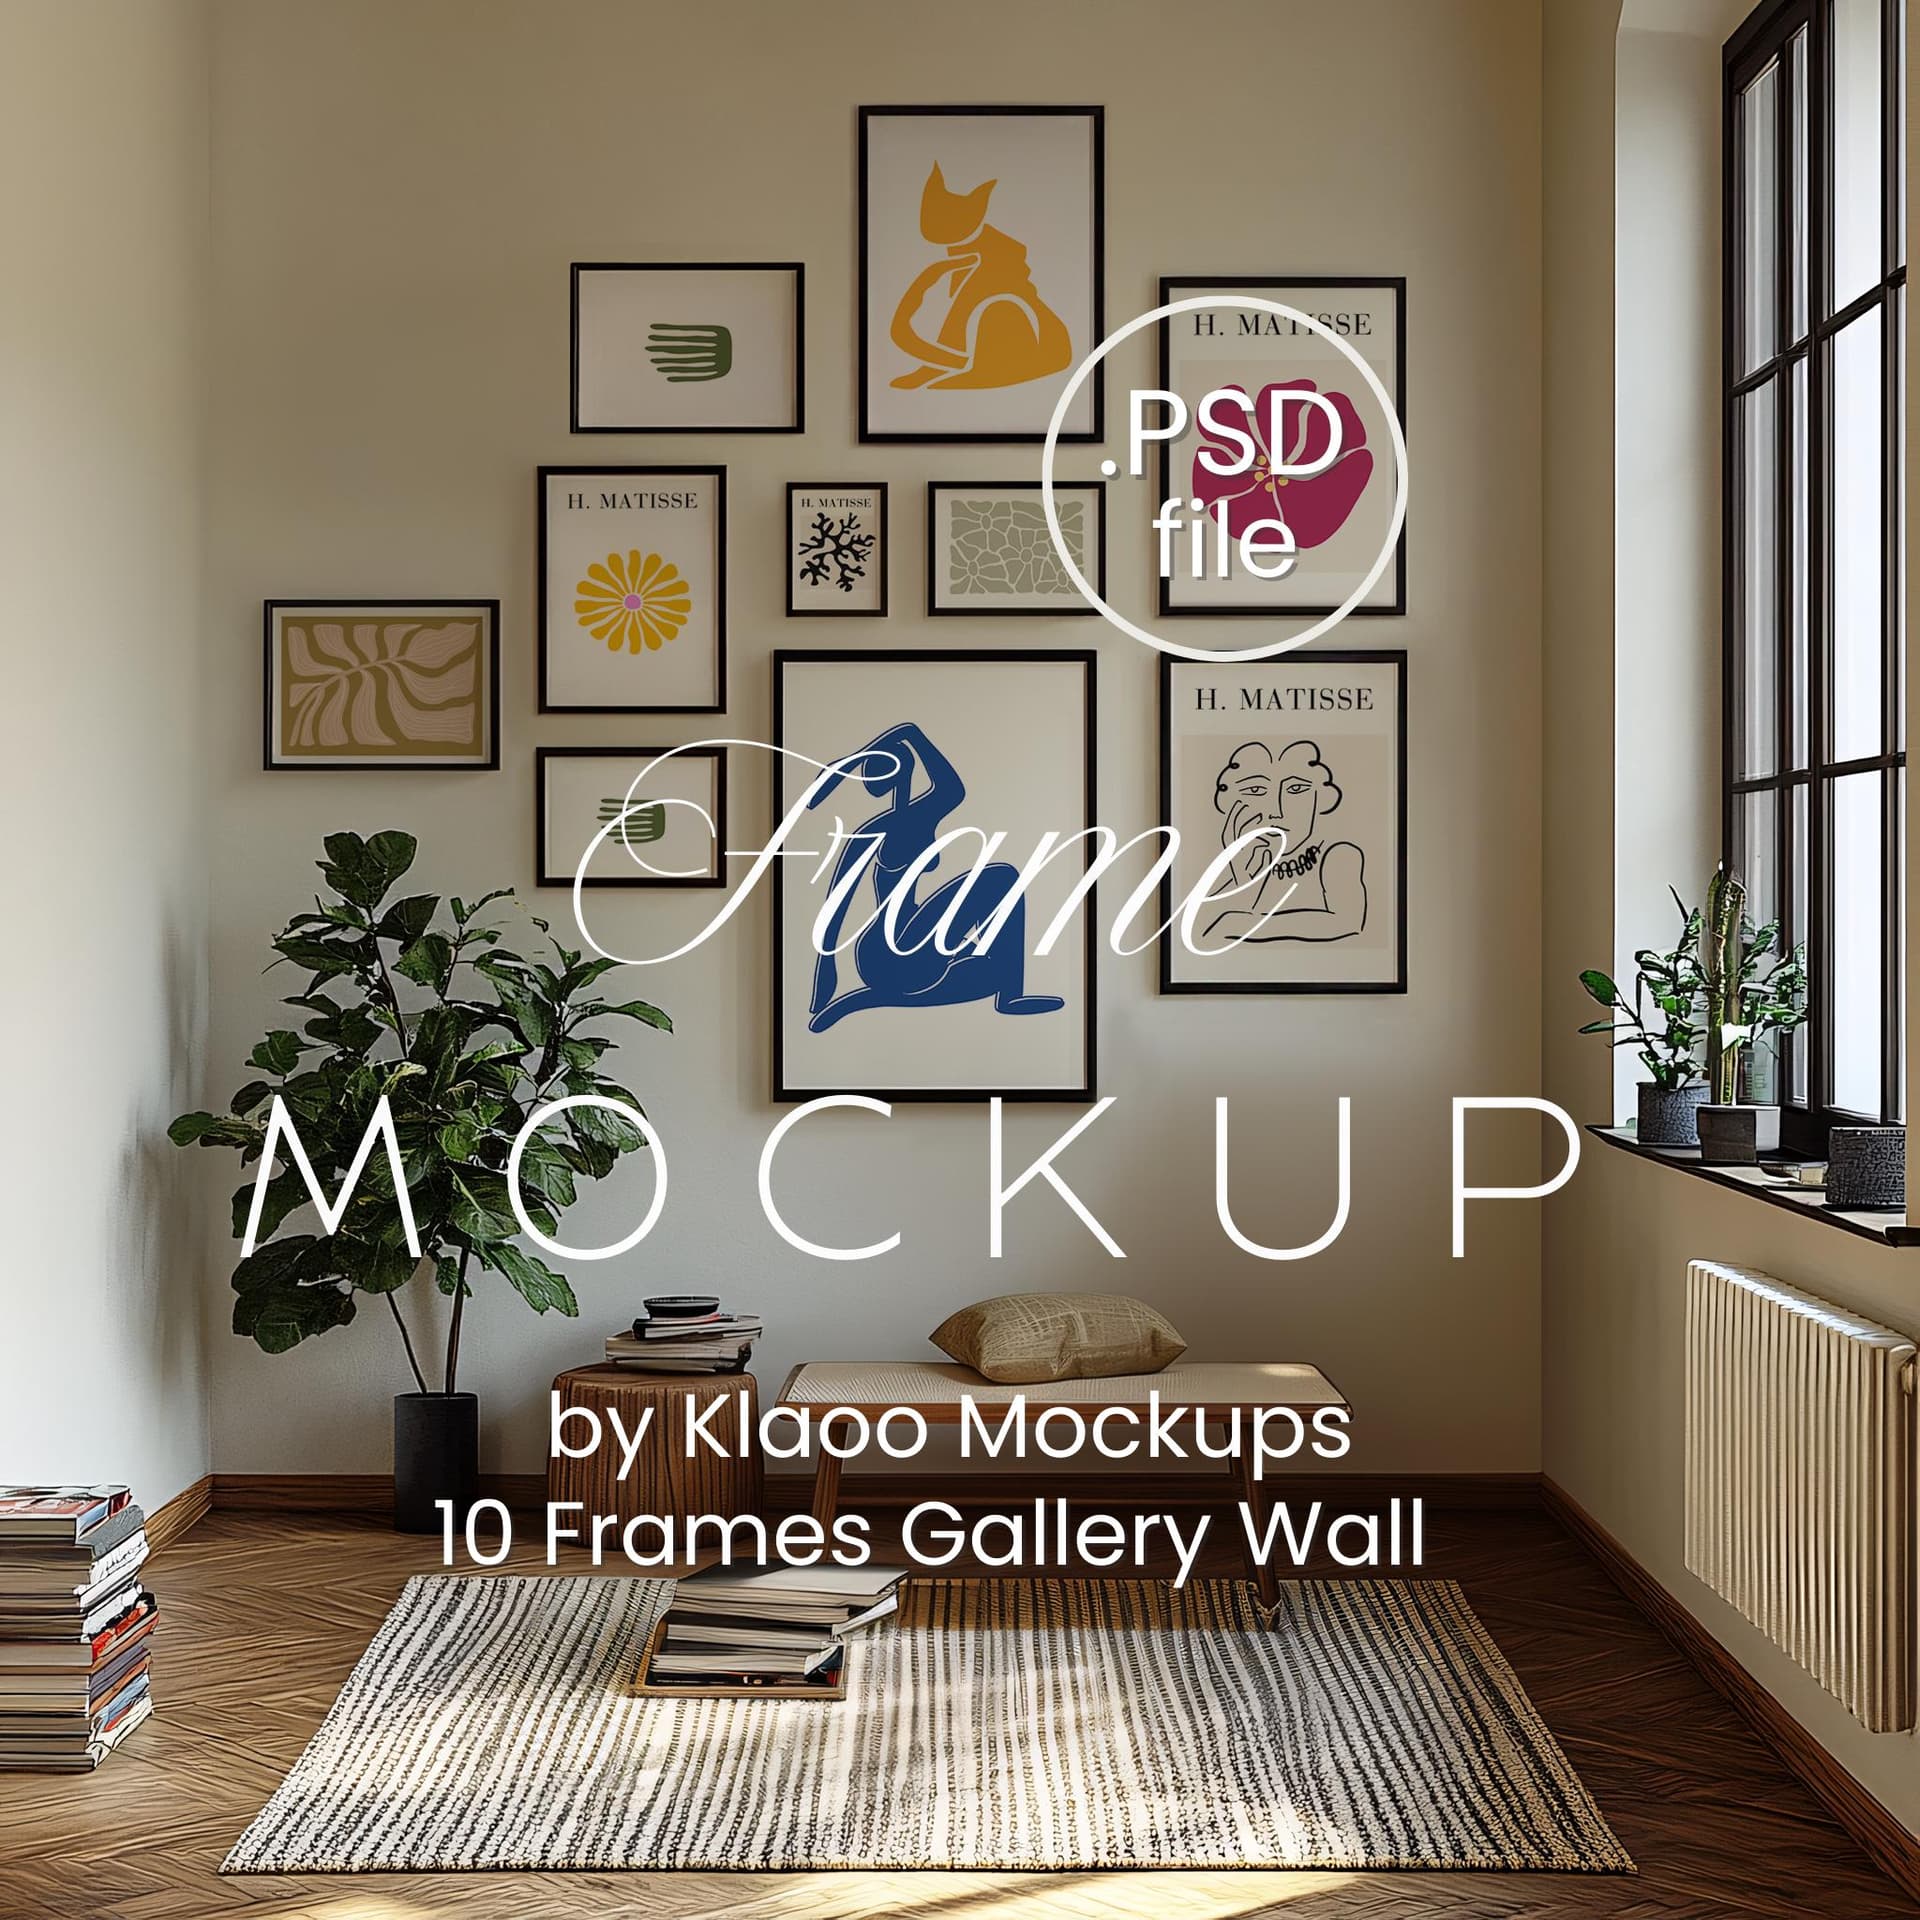
For the same design offered in multiple sizes, try to use the same style of frame and room scene across your mockup images, just scaled appropriately for each size. If your 8x10 is shown in a minimalist white frame on a white wall, your 16x20 should also be shown in a minimalist white frame, not a rustic wooden one in a different room.
This consistency signals to buyers that you are a professional seller who pays attention to detail. It also makes your shop gallery look intentional rather than random.
Building a repeatable workflow with a consistent template library is exactly what makes this consistency achievable at scale without extra effort.
Use Consistent Image Dimensions for Upload
Etsy and Shopify both display listing images at specific aspect ratios. Etsy thumbnails are square, so your mockup images will be cropped in the gallery view. Make sure the key part of your mockup composition, the print itself, is centered enough to survive that crop.
Export all your mockup images at the same pixel dimensions so they look uniform in your shop. A common choice for Etsy is 2000x2000 pixels for the square crop, or 3000x2000 for a landscape orientation. Pick one standard and stick to it across all your listings.
Takeaway: Consistency in style and image dimensions across all size variants makes your shop look more professional and takes almost no extra effort once your templates are set up correctly.
Scaling This System as Your Shop Grows
Once you have this batch workflow running smoothly for one design, the real win is in how easily it scales. Adding your twentieth design to a well-organized system takes minutes because all the decisions have already been made.
How to Onboard New Designs Without Rethinking Everything
When a new design is ready, your checklist looks like this:
Export design at correct dimensions for each ratio group.
Open mockup tool, load ratio group templates.
Apply design to each template, export with descriptive names.
Repeat for each ratio group.
Upload to Etsy or Shopify.
The decisions about which templates to use, what naming convention to follow, and what sizes to offer have already been made. You are just executing a system, not making creative decisions from scratch each time. This is what makes it possible to onboard new designs in under five minutes once the infrastructure is in place.
Automating Further With Bulk Tools
If your shop grows to a point where even a streamlined batch session feels slow, there are options for further automation. Mockupanda is built specifically for this kind of high-volume workflow, letting you apply templates to multiple designs at once rather than one at a time. For sellers running large catalogs, the time savings are significant enough to change what is realistically possible in a single workday.
For shops with very large catalogs or complex workflows, an API-based approach can take automation even further, removing manual steps entirely for repeat processes.
Takeaway: Treat each new design as an execution task within an existing system, not a fresh design project. The less you have to decide per design, the faster your shop can grow.
Wrapping Up
Creating mockups for ten size variants of the same design does not have to mean starting over ten times. The key shifts are simple: group your sizes by aspect ratio, build a small reusable template library, work through one ratio group at a time, and name your exports clearly.
Once this system is running, adding new designs gets faster with every iteration because you are refining a process rather than reinventing one. Your shop looks more consistent, your listings go live faster, and you spend less of your week on repetitive production work.
If you are ready to stop doing this manually and start batching it properly, Mockupanda was built for exactly this kind of workflow. Give it a try and see how much of your week you get back.
Keep reading
How to Use Batch Mockup Generation to Stay Consistent When You Have Multiple Designers Uploading New Artwork to Your Shop
How to Batch Generate Mockups for an Entire Product Collection and Upload Them to Etsy in One Sitting