How to Batch-Apply a Holiday Promo Badge to Your Entire Etsy Wall Art Catalog in One Session
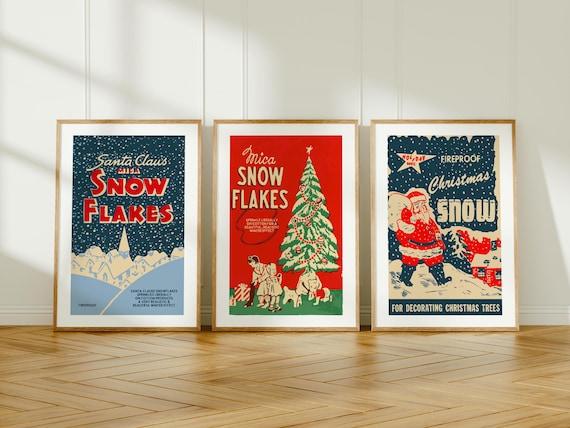
The holiday season is the single biggest revenue window for Etsy wall art sellers, and the difference between a listing that converts and one that gets scrolled past often comes down to one thing: does it look like you're running a real promotion, or does it look like a static product photo that hasn't changed since January?
Adding a promo badge, something like "20% OFF" or "Holiday Sale" or "Limited Edition Gift" to your listing images signals urgency and seasonality at a glance. Shoppers don't read descriptions before they click. They scan thumbnails. A well-placed badge on your mockup does the selling before the title even registers.
The problem is the volume. If you have 40, 80, or 200 designs in your catalog, manually opening each one in Canva or Photoshop, adding a text layer, exporting it, resizing it, and saving it is not a holiday-season task. It's a week-long ordeal. By the time you finish, the sale is half over.
This guide walks you through how to do the whole thing in one session using Mockupanda's bulk mockup generator, covering both the web app route and the API route for sellers who want to fully automate the process.
Why Your Holiday Listing Images Need a Promo Badge
The Thumbnail Problem on Etsy
Etsy's search results show a grid of thumbnails. Every seller in your niche is competing for the same eyeball at the same moment. During the holiday rush, that competition gets even more intense because ad spend goes up, promoted listings multiply, and buyers are actively comparing.
A promo badge on your mockup image does three things simultaneously. It signals that you have a deal right now, which triggers urgency. It differentiates your thumbnail visually from the identical-looking wall art listings around it. And it sets the buyer's expectation before they even land on your listing page, which increases the likelihood they'll read your description and follow through.
None of that requires a complicated design. A simple text overlay, "Holiday Sale" in a clean font, positioned in a corner or across the top, is enough. The key is applying it consistently across every variation in your catalog so your shop looks cohesive rather than patched together.
Consistency Across Your Catalog Matters More Than You Think
If you update 20 listings with a holiday badge and leave 30 unchanged, your shop looks like it's halfway through a renovation. Buyers who browse your full catalog, and a meaningful percentage of your returning customers will, notice the inconsistency. It erodes the sense that your shop is professionally run.
Batch processing fixes this. You apply the badge once, to a template or a set of templates, and every design in your catalog gets the same treatment in the same session. The result is a shop that looks like it was prepared for the holidays, not like you squeezed in updates between other tasks.
Takeaway: Before the holiday rush, decide on your badge copy, your placement, and your font. Nail those decisions once, and then let batch processing do the repetitive work.
Setting Up Your Text Overlay in Mockupanda
Choosing the Right Badge Copy and Placement
Before you open the editor, make two decisions: what the badge will say and where it will sit on the mockup.
For badge copy, keep it short and scannable. "20% OFF," "Holiday Sale," "Gift-Ready," or "Limited Edition" all work. Avoid anything that requires more than a second to read in a thumbnail context. If you're running an Etsy sale with a specific discount, use the number. Specificity converts better than vague claims.
For placement, the top-left corner is a natural reading anchor and tends to feel like a label rather than an ad. The bottom-right corner is unobtrusive and lets the artwork breathe. A centered bottom strip works well for wider badges. Avoid the center of the image unless you want the badge to be the dominant visual element, which works for some promotional styles but will obscure the art itself.
Using the Text Tool in the Mockupanda Editor
Mockupanda includes a text overlay tool built directly into the editor. Here's how to use it for your holiday badge.
Upload your design file using the drag-and-drop artwork upload. PNG files with transparent backgrounds are accepted, as are JPEG, WebP, and GIF files. Once your artwork is placed on the template, open the text tool from the editor controls.
Type your badge copy. The text tool gives you control over font, size, color, alignment, and position. For a holiday badge, a bold sans-serif font in white or a warm off-white tends to read well over most wall art mockup scenes. If your badge needs a background color to stand out, consider adding a contrasting text block behind it using the positioning controls.
Position the text where you decided in step one. The editor lets you move and resize text in real time, so you can eyeball the placement before committing. When you're happy with it, the text is baked into the final downloaded image, which means it appears at full resolution in the JPEG output with no separate layer to manage.
Takeaway: Spend 10 minutes in the editor settling on your badge style before you move to bulk generation. Every design in your catalog will inherit these settings, so getting it right once saves you from fixing it at scale.
Running Bulk Mockup Generation With Your Badge Applied
How Bulk Generation Works
The core feature that makes holiday catalog updates practical is bulk mockup creation. Instead of applying your design to one template at a time, you upload the design once and apply it across as many templates as you need in a single operation.
In the Mockupanda web app, you can use Sets to organize the mockup templates you use for your wall art listings. A Set is a named, ordered group of templates saved in the app. If you've already built a Set for your standard wall art mockup workflow, you can apply your holiday badge design across all templates in that Set in one session.
For sellers with multiple design files, the workflow is:
Set up your text overlay badge on the first design as described above.
Apply it across your chosen templates to generate mockups for that design.
Download all variations as a ZIP file.
Move to the next design file and repeat.
The editor keeps your template selections and layout settings active between uploads, so you're not reconfiguring from scratch for each new design. The badge text, font, size, position, and color all stay in place. You're just swapping the artwork.
Downloading and Organizing Your Output
Mockupanda downloads generate as JPEG files at approximately 90% quality, which is well within Etsy's listing image requirements. When you generate multiple mockup variations, they come packaged as a ZIP file, which keeps your downloads organized by session.
Name your ZIP downloads by design or collection before you extract them. Something like holiday-sale-botanical-prints.zip or christmas-2024-abstract-collection.zip gives you a clear reference when you're batch-uploading to Etsy or Shopify later.
If you're updating existing listings rather than creating new ones, match each generated mockup file back to its listing before you start uploading. The fastest way to do this is to name your original design files clearly before you upload them to Mockupanda, because the output file names will correspond to your input file names.
Takeaway: Use Sets to group your standard wall art templates, and download your output as ZIPs organized by design or collection. This makes the Etsy upload step much faster and reduces the risk of mismatching a mockup with the wrong listing.
Automating the Whole Process With the Mockupanda API
Who the API Route Is For
If you have a large catalog, run seasonal promotions multiple times per year, or want to trigger mockup generation programmatically, the Mockupanda REST API turns what is already a fast manual workflow into a fully automated one.
The API is available at https://www.mockupanda.com/api/v1 and supports a POST /mockups/generate endpoint that accepts a design file URL, a list of template IDs, and text overlay parameters. You can process up to 12 templates per request in batch mode, and the API returns rendered mockup URLs in 1 to 4 seconds per request depending on template complexity.
For a holiday badge workflow, the API approach looks like this: you write a script that loops through your design file URLs, sends each one to the API with your badge text parameters and your target template IDs, and saves the returned mockup URLs or downloads the files locally. Run the script once at the start of the holiday season, and your entire catalog is updated.
Setting Up a Batch Script for Your Catalog
Here's what a basic Python script structure looks like for this workflow:
import requests

API_KEY = "your_api_key_here"
BASE_URL = "https://www.mockupanda.com/api/v1"

designs = [
    "https://your-storage.com/design-1.png",
    "https://your-storage.com/design-2.png",
    # add all your design URLs here
]

template_ids = ["template_id_1", "template_id_2", "template_id_3"]

badge_text = {
    "content": "Holiday Sale",
    "font_size": 48,
    "color": "#FFFFFF",
    "position_x": 50,
    "position_y": 50
}

for design_url in designs:
    response = requests.post(
        f"{BASE_URL}/mockups/generate",
        headers={"Authorization": f"Bearer {API_KEY}"},
        json={
            "artwork_url": design_url,
            "template_ids": template_ids,
            "text": badge_text
        }
    )
    result = response.json()
    print(result)
You can retrieve your template IDs from the GET /templates endpoint, which supports hybrid semantic search via the q parameter. Searching for q=wall art poster will filter the template library to print-relevant scenes so you're not wading through apparel or mug templates.
API credits are priced at $0.01 per mockup, so generating 3 mockup variations for 100 designs costs $3.00 in API credits. Credits never expire and failed requests cost zero credits, which means you can test your script without burning your balance.
Using Sets With the API for Cleaner Workflows
If you've saved a Set in the web app containing your standard wall art mockup templates, you can pass a single set_id to the API instead of listing individual template IDs in every request. The GET /sets endpoint returns all your saved sets with their IDs, and GET /sets/{id} returns the ordered list of templates within a specific set.
This is the cleanest approach for seasonal updates. Build one Set called "Wall Art Holiday 2024" in the web app, add the templates you want, and then reference that set_id in every API call. When the season ends and you want to retire the holiday badge, you update the Set or switch to a different set_id in your script. No other code changes needed.
Takeaway: If you run promotions more than once or twice per year, the API pays for itself in time saved. Build a reusable script once, parameterize your badge text and set ID, and you can update your entire catalog in minutes at the start of any promotional period.
Custom PSD Templates for a More Branded Holiday Badge
When to Use a Custom Template
The built-in template library covers a wide range of wall art mockup scenes, and for most sellers the text overlay tool is all you need to add a holiday badge. But if you want a more designed badge, something with a specific shape, a ribbon graphic, a snowflake icon, or a branded color block behind the text, a custom PSD template gives you full control.
Mockupanda supports custom PSD template uploads up to 300 MB. Your PSD needs a Smart Object layer named Design as the active layer. Everything else in the PSD, including any badge graphics, decorative elements, or background treatments you've added, stays locked in place while your artwork drops into the Smart Object.
This means you can build a holiday-branded mockup scene in Photoshop once, with your badge already embedded as a graphic element in the PSD, and then use it as a custom template. Every design you apply through Mockupanda will automatically appear inside that scene with the badge already present, no text overlay configuration needed at all.
Building a Holiday PSD Template
To build a custom holiday template:
Start with a room scene or flat lay photo where you want your art to appear.
Add your badge graphic as a static layer in the PSD. This could be a ribbon, a banner, a colored block, or any holiday design element.
Create a Smart Object layer named
Designand position it where you want the artwork to appear in the scene.Export the PSD and upload it to Mockupanda as a custom template.
Once uploaded, it behaves exactly like a built-in template. You can include it in a Set, reference it by template ID in the API, and apply designs to it in bulk.
The advantage is that your badge becomes part of the scene itself rather than a text layer, which gives you much more visual flexibility. The tradeoff is that updating the badge copy requires re-exporting and re-uploading the PSD. For a holiday sale with fixed copy like "Holiday Sale" or "25% OFF," that's a one-time setup cost that's well worth it.
Takeaway: Use custom PSD templates when your badge design is more complex than text alone. Build it once in Photoshop, upload it as a custom template, and treat it like any other template in your bulk workflow.
Timing Your Holiday Catalog Update
When to Update Your Mockups
The optimal window for holiday listing image updates depends on which holiday you're targeting. For Christmas and Hanukkah, Etsy search traffic for gift-related wall art starts climbing in early November. If you wait until December 1st, you've already missed a significant share of the gift-buying window.
For Black Friday and Cyber Monday, update your mockups the week before, not the day before. Etsy's algorithm takes time to index changes, and buyers who find your listings earlier in the week are more likely to purchase during the sale weekend.
For Valentine's Day, Mother's Day, and other mid-year occasions, the same principle applies. Update 10 to 14 days before the occasion, when gift search intent is rising but before the peak competition day.
Reverting After the Sale
Having a plan for reverting your mockups after the sale ends is just as important as the update itself. If your listing images still show a "Holiday Sale" badge in February, it signals to buyers that your shop is not actively managed, which undermines trust.
The fastest revert workflow is to keep your pre-holiday mockup ZIPs organized and labeled. When the sale ends, you already have the clean versions ready to re-upload. If you used the API with a Set, swap the Set ID back to your standard wall art Set and regenerate. The whole revert takes the same amount of time as the original update.
Takeaway: Calendar your mockup update and your revert date at the same time. Knowing both dates in advance means neither one gets dropped when the holiday season gets chaotic.
Putting It All Together
A holiday promo badge on your listing images is one of the highest-leverage visual updates you can make as an Etsy wall art seller. It signals urgency, differentiates your thumbnails, and sets buyer expectations before they even click. The reason most sellers don't do it consistently is the time cost of applying it manually across a large catalog.
Batch processing with Mockupanda removes that barrier entirely. You configure your badge text once in the editor, apply it across your full template Set in bulk, download organized ZIPs, and upload to Etsy. If you want to go further and automate the process for every promotional period going forward, the REST API and Sets workflow lets you do the same thing with a script that runs in minutes.
The sellers who show up to the holiday season with a cohesive, promotion-ready catalog are the ones who planned the mechanics in advance. The creative work, picking your badge copy, your placement, your template scenes, takes an afternoon. The execution, once you've built the workflow, takes less than an hour.
Start with one design. Get the badge right. Then let bulk generation handle the rest.
Keep reading
How to Build a Gallery Wall Mockup That Sells a Diptych or Triptych Set as a Bundle on Etsy
How to Upload a Custom PSD Template to a Mockup Generator So Your Brand's Unique Scenes Render Consistently at Scale