Wall Art Mockup Generator: How to Turn One Design Into a Full Set of Room-Scene Listing Images in Minutes
If you sell wall art or framed prints online, you already know the problem. You finish a new design, and then you spend the next hour or two dragging it into mockup after mockup, one frame style at a time, trying to get every room scene looking consistent before you can even think about writing your listing. Multiply that by every design in a growing catalog and the mockup step starts eating your week.
A proper wall art generator solves this at the root. You upload your design once, and the tool does the work of placing it across every room-scene template you need. Mockupanda is built around exactly that idea: one upload, real-time previews across dozens of templates, and a ZIP download you can take straight to your shop. The sections below break down how the workflow actually runs, what to watch out for with aspect ratios and multi-frame templates, and how to push the same logic into automated workflows with the API.
Why One-at-a-Time Mockup Work Does Not Scale
The Hidden Time Cost of Manual Mockups
Most sellers underestimate how long mockup creation actually takes because they measure it per listing rather than per week. When you are creating 20 or more listings a week, the per-listing time compounds fast. Processing each template manually means opening the tool, uploading the file, adjusting the artwork position, exporting, naming the file, and repeating. Sellers who switch to batching their mockup generation rather than processing each template manually can save several hours every week.
The consistency problem is just as real. When you generate mockups one at a time over several sessions, tiny differences in how you position the artwork or which export settings you use start to show up across your shop. A catalog that looks coherent builds buyer trust. A catalog where each listing looks slightly different from its neighbors undercuts the premium feel you are going for, even if every individual mockup is technically fine.
What a Wall Art Generator Should Actually Do
The minimum bar for a wall art generator worth using is straightforward: upload once, preview across many templates in real time, download everything in one go. Mockupanda hits all three. The bulk mockup generator focuses specifically on Wall Art and Frame categories, which are the most in-demand template types for print sellers, and it shows you all 50-plus mockups updating in real time the moment you upload your design. No waiting between templates, no clicking through one at a time.
The output format matters too. You get high-quality JPEGs at approximately 90 percent quality, delivered as a single ZIP archive when you have generated multiple variations. That ZIP is ready to upload directly to Etsy, Shopify, or any POD platform without any further processing.
Takeaway: Before you evaluate any mockup tool, map out how many listings you create per week and multiply by the time you spend on mockups per listing. That number tells you how much the right tool is worth to you.
The Three-Step Upload-to-ZIP Workflow
Step One: Upload Your Design
Drag and drop your artwork file into the editor. Mockupanda accepts JPEG, PNG, GIF, and WebP. If your design has a transparent background, use a PNG and the alpha channel is fully preserved when the artwork is placed into the mockup. For fine line work and illustrations especially, transparent PNGs give you the cleanest result because the wall color in the room scene shows through wherever your design has no ink.
There is no strict file size cap on uploads. You can bring in high-resolution files and they are automatically optimized during processing, which runs entirely in your browser. Very large files may take a bit longer depending on your device, but the resolution of your source file is not artificially limited.
If you are working with a PSD template you have purchased or created yourself, you can upload that too. PSDs up to 300 MB are supported. The requirement is that your PSD contains a Smart Object layer named Design and that layer is the active selected layer when you save the file. That naming convention is how the generator knows exactly where to place your artwork inside the template.
Step Two: Pick Your Templates
Once your design is uploaded, you pick the Wall Art and Frame templates you want. In the bulk generator view, your artwork is instantly applied to every template in that category so you can see real-time previews of all of them together. You can then select the specific ones you want to include in your download.
The editor also has a drag-and-drop interface where you can move and resize your artwork within a template before generating, and a text tool that lets you add overlays with custom fonts, size, color, alignment, and position, all baked into the final downloaded image. That last detail matters: the text is not a separate layer you have to composite later, it is part of the JPEG you download.
Aspect ratio is worth paying attention to here. Each print template expects a specific artwork aspect ratio. Artwork that does not match the frame's ratio will be cropped or stretched to fill the frame, which is exactly the thing that makes a mockup look wrong. The API includes aspect-ratio and artwork-matching filters so you can ask for templates that fit your artwork's specific ratio rather than checking each one manually.
Step Three: Download as ZIP
Select the templates you want and export. If you have generated multiple variations, you download them all as a single ZIP archive. The ZIP is ready to upload directly to Etsy, Shopify, or any POD platform.
For sellers on the Free plan, mockups include a watermark. Starter gives you 700 downloads per month. Pro gives you unlimited downloads with no watermark and priority support. The Lifetime plan, available for a limited time at a one-time payment of $129, also gives you unlimited templates and no watermark.
Takeaway: Use a transparent PNG as your source file whenever your design has fine lines or a non-white background. It gives you the most flexibility across different room scene templates and wall colors.
Working With Multi-Frame Templates: Diptychs and Triptychs
What Multi-Frame Templates Are
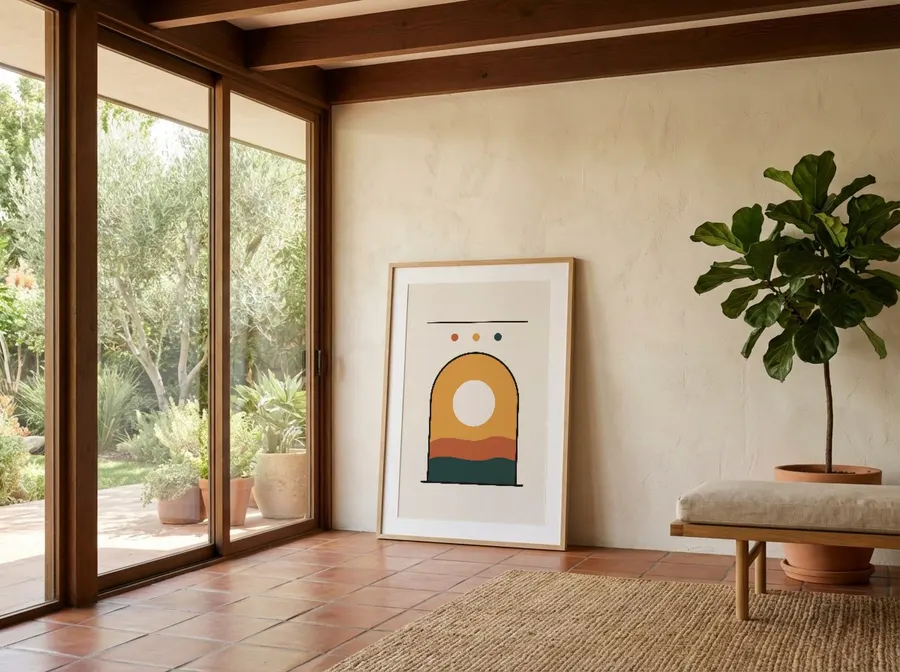
Some wall art templates show more than one frame in the same room scene. A diptych has two frames displayed together; a triptych has three. These are popular listing formats because they let buyers visualize a coordinated set of prints hanging together on a wall rather than a single piece in isolation.
The important thing to understand is what happens when you get to the API or when you are thinking about how to structure your artwork files, since multi-frame templates expect artwork mapped to each frame individually rather than one image stretched across the whole scene.
Supplying Artwork for Each Frame via the API
If you are automating mockup generation through the REST API, the distinction between single-frame and multi-frame templates changes how you structure your request. For a single-frame template, you pass one artwork_url. For multi-frame templates like diptychs and triptychs, you use artwork_urls and map each frame index to its own artwork file. Frame indices start at 0, so for a triptych template with three frames you use keys "0", "1", and "2".
Here is what a request for a diptych template looks like:
curl -X POST https://www.mockupanda.com/api/v1/mockups/generate \
--http1.1 \
-H "Authorization: Bearer YOUR_API_KEY" \
-H "Content-Type: application/json" \
-d '{
  "template_id": "wall-diptych-01",
  "artwork_urls": {
    "0": "https://example.com/art1.jpg",
    "1": "https://example.com/art2.jpg"
  }
}'
This level of control is especially useful when you sell coordinated print collections, where each frame in a diptych or triptych scene should show a different print from the same series. For more on how to present a multi-print collection effectively, see how the gallery wall mockup approach can help you show coordinated prints in a single scene.
Render Quality: No Distortion, Accurate Perspective
The quality difference between a good mockup and a bad one comes down to how the artwork is placed on the surface. Mockupanda uses accurate perspective mapping for print templates, which means your artwork sits naturally on the wall as if it were a real photograph. There are no flat overlays, no skewed proportions, and no AI distortion or blurring of your artwork.
The two render modes available via the API are corners (perspective warp) and uvmap (UV-mapped product surface). For wall art and framed print templates, the perspective warp approach is what gives you that realistic sense of depth and angle that makes a room-scene mockup convincing.
Takeaway: When you sell coordinated print series, check whether your preferred templates include diptych and triptych options. A single listing image showing all three prints in one room scene is often more compelling than three separate single-frame mockups.
Using Sets to Reuse Your Mockup Configuration Across Every Listing
What a Set Is and Why It Matters
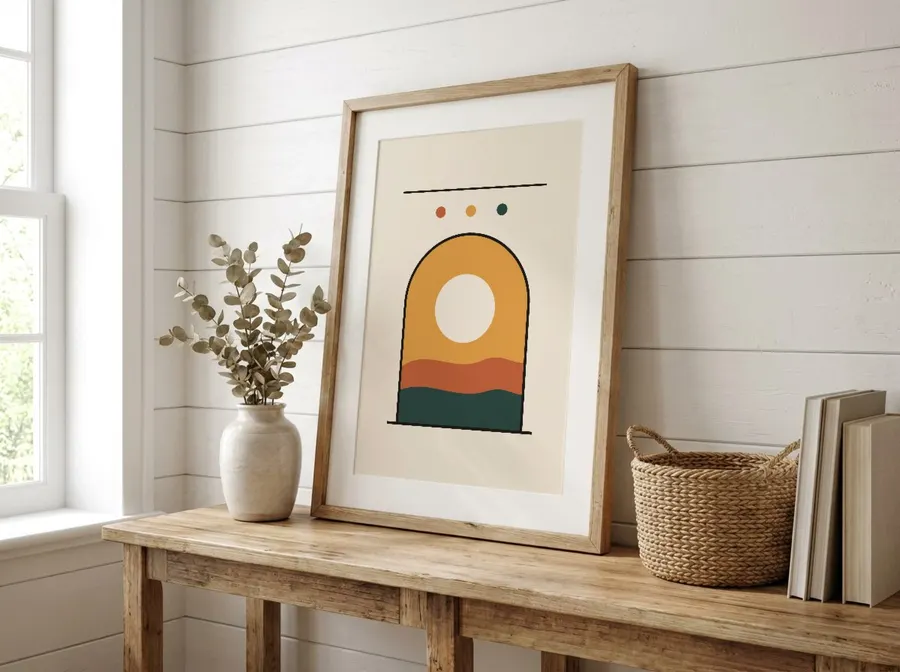
A Set in Mockupanda is a named, ordered group of templates saved to your account. If every listing in your shop uses the same group of mockup scenes, you save that group once as a Set and then render the whole group with a single set_id instead of rebuilding the same list of templates every time you create a new listing.
Sets can mix built-in templates with your own custom ones. They are created and managed in the app under Sets, and they belong to the account tied to your API key. The practical implication is that your "standard wall art listing package" becomes a reusable object you define once and invoke repeatedly, whether you are working in the web app or making API calls.
This connects directly to how you can structure your workflow when doing a seasonal refresh. If you need to swap a template across a large batch of existing listings, having your templates organized into Sets means you update the Set once and render from it, rather than editing the template list for every listing. The post on structuring your Sets for seasonal template swaps covers that pattern in detail.
Rendering a Set via the API
The API endpoint for generating mockups from a Set is the same POST /mockups/generate endpoint. Instead of passing individual template_ids, you pass your set_id. The API returns a rendered mockup for every template in the Set in a single response.
You can also retrieve a list of your Sets with GET /sets and get the details of a specific Set with GET /sets/{id}. This makes it straightforward to build a lightweight internal tool where a team member picks a design file and a Set name, and the API handles all the rendering without that person needing to know anything about which individual template IDs are involved.
Batch Mode for Rapid Generation
Outside of Sets, the API also supports a batch mode where you pass an array of template_ids in a single request, up to 12 templates per request. If you need more than 12, you make multiple requests. The rate limits are 100 requests per minute and 10,000 requests per day per API key, which gives you substantial headroom for catalog-scale operations.
API pricing is $0.01 per mockup, with credits purchased in advance via the API wallet. The minimum top-up is $1.00 and credits never expire. Failed requests cost 0 credits, so you are never charged for a render that did not complete successfully.
Takeaway: Create a Set for each listing type in your shop rather than a single global Set. A Set for your portrait-format prints, one for square prints, and one for horizontal panoramics lets you route each new design to the right group automatically and keeps your mockup styles visually coherent within each product category.
Applying This to a Real Catalog Build
Launching a New Design From Zero
Suppose you have finished a new abstract print and you want it live on Etsy today with a full complement of room-scene listing images. The practical flow is: open the bulk mockup generator, drag in your PNG, let it apply to all the Wall Art and Frame templates in real time, pick the eight or ten scenes that best represent the range of room styles your buyers browse in, and download the ZIP. The whole process, from upload to files on your desktop, takes under a minute for a standard design according to the stated workflow.
If you are adding text to your mockup images, for example a title or a size callout baked into the listing image, the text tool lets you do that inside the editor and it comes out in the final JPEG. No post-processing in a separate app required.
For a more detailed look at how to fill every Etsy image slot with a coherent set of mockup styles without repeating a scene, the post on going from one design to twelve listing images walks through an exact workflow for that.
Scaling a Catalog of Hundreds of Designs
At catalog scale, the web editor workflow gives way to the API. You have your designs stored somewhere accessible by URL, you have a Set defined for each listing type, and you loop through your design inventory making API calls. Each call renders a mockup for every template in the Set. You store or download the results and feed them directly into your listing creation pipeline.
The API supports searching the template library with a hybrid semantic search parameter q, plus filtering by aspect ratio and artwork matching. This means you can programmatically find templates that fit your artwork without hardcoding template IDs, which is useful when you are onboarding new template types or doing periodic catalog audits.
Custom PSD templates are also an option if you have licensed mockup PSDs from places like Creative Market or Envato. Upload the PSD (up to 300 MB, with a Smart Object layer named Design as the active layer) and it becomes part of your template library, mixable into Sets just like the built-in templates.
Takeaway: Even if you are not ready to build an API integration today, structure your web app usage as if you will be. Use Sets consistently, name your designs descriptively, and keep your source files organized by aspect ratio. When you are ready to automate, the transition is a matter of wiring up calls rather than redesigning your whole workflow.
Getting Your Listing Images Right the First Time
The gap between a listing image that converts and one that does not is often not the design itself. It is whether the design looks like it belongs in the room. Accurate perspective mapping, preserved transparency, consistent resolution across the whole batch, and room scenes that reflect the actual interiors your buyers live in all contribute to that sense of realism.
Mockupanda is built specifically for print-on-demand sellers who need that quality at speed, without the per-mockup credit stress or the AI-blurred artwork that some other tools produce. The free plan lets you generate unlimited watermarked mockups to test the tool before committing to a paid plan, so there is no reason not to run your next new design through it before you go live.
Whether you are launching your first print or managing a catalog of hundreds, the workflow is the same: upload once, generate many, download as ZIP, and move on to the next design.
Keep reading
Shopify Mockup Generator: How to Push Bulk-Generated Listing Photos Directly to Your Shopify Store Without Manual Uploads
How to Build a Gallery Wall Mockup That Sells a Diptych or Triptych Set as a Bundle on Etsy