How to Use a Poster Mockup API to Instantly Populate a New Shopify Product Page With All Listing Images on Creation
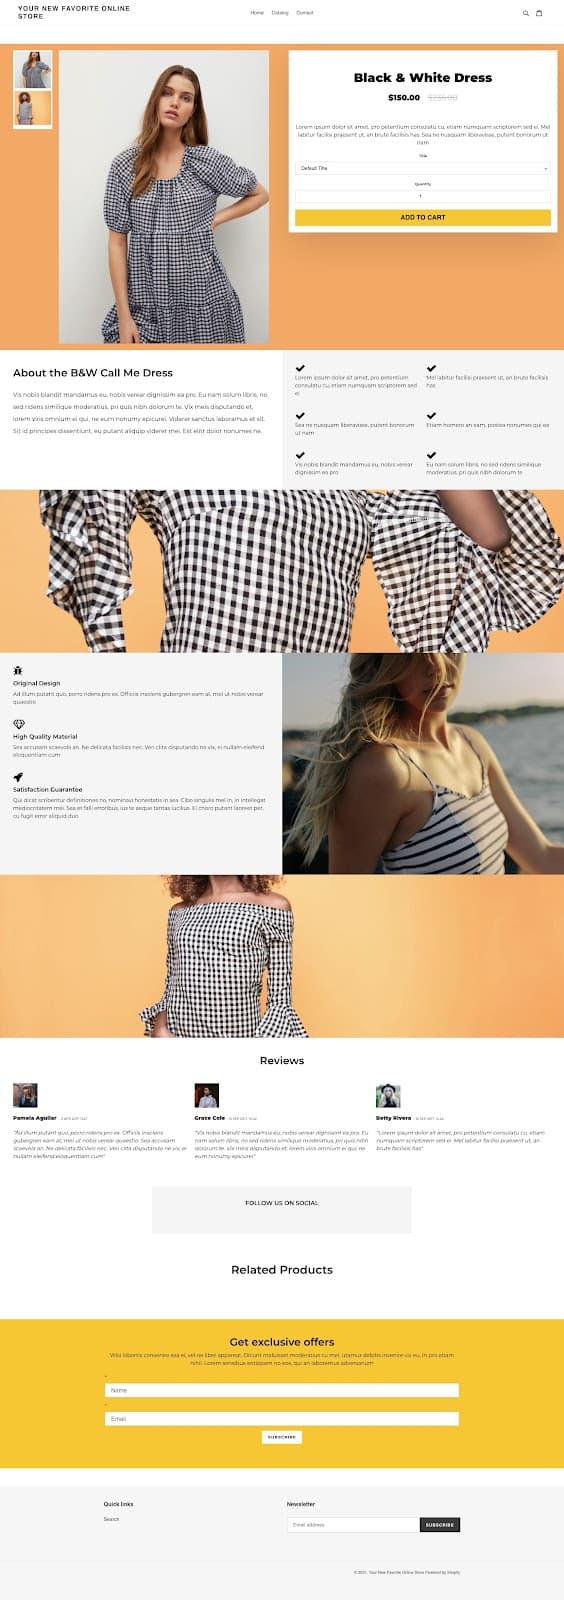
There is a specific kind of frustration that comes with running a print-on-demand shop on Shopify. You spend real creative energy designing something, you get excited about it, and then you sit down to actually list the product and suddenly the next 45 minutes are gone. You are downloading mockup files, uploading your design, resizing images, exporting PNGs, uploading them back to Shopify, reordering them, and triple-checking that the right image ended up in the right slot.
Now multiply that by 10 new products a week, or 50, or 200 if you are scaling a catalog.
This is exactly the problem a poster mockup API is built to solve. Instead of doing that work manually, you wire up your store so that the moment a new product is created in Shopify, an API call goes out, your design gets dropped into a set of mockup templates automatically, and the finished images come back and attach themselves directly to the product listing. The whole thing happens in seconds.
This guide covers how that system works, how to build it step by step, and what you actually need to get started even if you are not a developer.
Why Manual Mockup Uploads Are Killing Your Momentum
The Hidden Time Cost of Product Photography
Most Shopify sellers underestimate how much time goes into image preparation. A single product listing typically needs 4 to 8 images to perform well: a clean primary shot, a lifestyle scene, a close-up texture, maybe a framed version in a room setting. If you are doing that manually for every new product, the time adds up to something genuinely alarming by the end of a month.
For sellers running high-volume print-on-demand operations, this is not a minor inconvenience. It is a ceiling on how fast you can grow. Every product you cannot list because you ran out of time to create mockups is revenue sitting on the table.
Inconsistency Hurts Your Brand
Beyond time, manual workflows introduce inconsistency. When you are rushing through mockup creation, you end up with slightly different cropping, different lighting tones, different frame styles across your listings. Shoppers notice this even if they cannot name it. A shop with a consistent visual identity converts better than one that looks like it was assembled from five different sources.
An automated API-driven workflow does not get tired or distracted. Every product gets the same set of mockups, in the same order, with the same quality. That consistency compounds over time into a more professional-looking store.
The Moment You Stop Listing Is the Moment You Stop Growing
Shopify and Etsy both reward catalog depth and fresh listings. If your mockup creation workflow is bottlenecking how often you publish new products, you are not just losing time, you are actively limiting your discoverability. Automating the image generation step removes the single biggest friction point between having a new design and having a live, shoppable product.
Actionable takeaway: Track how long you currently spend on image preparation per product. Multiply that by your weekly new product count. If that number is over two hours a week, automation will pay for itself almost immediately.
Understanding How a Poster Mockup API Works
What the API Actually Does
An API, in plain language, is a way for two pieces of software to talk to each other. When you use a poster mockup API, you are sending a request that says: here is my design file, here is the mockup template I want to use, now send me back the finished image.
Mockupanda is built specifically for this kind of workflow. You make an API call with your design URL and a template ID, and it returns a rendered mockup image. You can chain multiple calls together to generate your full set of listing images in a single automated sequence.
The API handles the compositing work, the perspective correction, the shadows, the texture overlays, everything that would take you 10 minutes per image in Photoshop or a manual mockup tool. It does it in a second or two per image.
The Shopify Side of the Equation
Shopify has its own API that lets you interact with your store programmatically. You can create products, update listings, add images, set variants, all through API calls. When you combine the Shopify API with a mockup API, you get a pipeline that looks like this:
A new product is created in your Shopify store.
A trigger fires (either a webhook or a scheduled check).
Your automation grabs the product's design file URL.
It sends that URL to the mockup API with a list of template IDs.
The mockup API returns finished image URLs.
Those image URLs get pushed back to Shopify and attached to the product.
The whole sequence can run in under 30 seconds. By the time you flip over to preview the product page, the images are already there.
Webhooks vs. Polling: Which Trigger to Use
There are two main ways to detect when a new Shopify product is created. The first is a webhook, which is a real-time notification Shopify sends to a URL you specify the moment a product creation event happens. The second is polling, where your automation checks Shopify every few minutes for new products.
For most sellers, webhooks are the better choice because they are instant and do not waste API calls on empty checks. If you want a deeper look at how webhooks fit into a mockup automation pipeline, the concept is covered well in the context of design approval workflows, and the same triggering logic applies here.
Actionable takeaway: Before you build anything, map out your product creation flow. Decide whether you want images to generate automatically the moment a product is created, or whether you want a manual trigger like a button or a tag change. Both are valid, and your answer will shape how you set up the automation.
Setting Up the Automation: A Step-by-Step Walkthrough
Step 1: Get Your API Credentials and Choose Your Templates
The first thing you need is access to a mockup API. With Mockupanda, you sign up, navigate to the API section of your account, and grab your API key. Keep this key private, it authorizes all requests on your behalf.
Next, decide which mockup templates you want to use for each product type. If you sell posters, you might want: a flat lay on a white surface, a framed version on a living room wall, a rolled version on a desk, and a close-up texture shot. Each of these templates has a unique ID in the API. Write down the IDs for the templates that make up your standard listing image set.
This template list becomes your default configuration. Any new poster product will run through this exact set of templates and come out with the same four images every time.
Step 2: Set Up Your Shopify Webhook
In your Shopify admin, go to Settings, then Notifications, then Webhooks. Create a new webhook for the `products/create` event. The destination URL is wherever your automation script or no-code tool is listening.
If you are using a no-code tool like Make (formerly Integromat) or Zapier, each of those platforms gives you a unique webhook URL you can paste directly into Shopify. If you are writing a custom script, you would deploy it somewhere like a serverless function on AWS Lambda or Vercel and use that function's public URL.
Once the webhook is live, every new product creation will fire a POST request to your chosen URL with the full product data in JSON format, including the product ID, title, images, and any tags or metafields you have set.
Step 3: Extract the Design File URL From the Payload
When Shopify sends the webhook payload, it includes any images already attached to the product. For this workflow to function cleanly, you need a consistent way to pass your design file into the automation.
The most common approach is to attach the raw design file as the first image on the product when you create it. Your automation then reads that first image URL from the webhook payload and uses it as the input for the mockup API. Some sellers prefer to store the design file URL in a product metafield instead, which keeps it separate from the visible product images.
Either approach works. What matters is that your automation knows exactly where to find the design file URL in the payload so it can pass it to the mockup API without manual input.
Actionable takeaway: Before you build the full pipeline, test your webhook by creating a dummy product in Shopify and inspecting the raw payload your automation receives. Make sure you can locate the design file URL reliably before you build the rest of the logic around it.

Making the Mockup API Calls and Handling the Responses
Structuring Your API Request
Once your automation has the design file URL, it needs to make a call to the mockup API for each template in your set. A basic request to the Mockupanda API looks something like this in plain terms: you send a POST request to the API endpoint, include your API key in the header, and pass a JSON body with the template ID and the URL of your design file.
The API processes the request and returns a response that includes the URL of the finished mockup image. You store that URL and move on to the next template in your list.
For a four-image listing, you are making four sequential API calls. Depending on your automation tool, you can run these in sequence or in parallel. Parallel execution is faster but requires a bit more logic to collect all four results before moving to the next step.
Handling Errors Gracefully
Any automation that talks to external APIs needs to handle errors. Sometimes a network call times out. Sometimes an image URL is not yet accessible because a CDN has not propagated it yet. Sometimes a template ID gets renamed.
Build in basic retry logic: if an API call fails, wait 5 seconds and try once more. If it fails a second time, log the product ID and send yourself a notification so you can investigate manually. Do not let a single failed mockup call silently break your entire product creation flow.
In no-code tools like Make, this is handled with error handler modules. In custom code, a simple try/catch with a retry loop covers most cases.
Pushing the Finished Images Back to Shopify
Once you have the URLs of all your generated mockup images, the final step is attaching them to the Shopify product. You use the Shopify Admin API's product image endpoint: send a POST request to `/admin/api/products/{product_id}/images.json` with each image URL.
Shopify will fetch the image from that URL and store it in your product's media library. Repeat for each mockup image. If you want to control the display order, assign a `position` value in each request: position 1 for the primary image, position 2 for the second, and so on.
At this point, your product page has a full set of professional mockup images and you never touched Photoshop, a manual mockup tool, or an upload button.
Actionable takeaway: Test the full pipeline end-to-end with a single product before you trust it with your entire catalog. Create one product, watch the automation run, check that the images appear on the Shopify product page in the right order, and confirm the quality looks correct before you let it run at scale.

Scaling the Workflow for High-Volume Catalogs
Batching New Products for Efficiency
If you are launching a large collection, you might create 20 or 50 products in a short window. Each one fires a webhook, each webhook kicks off four API calls, and suddenly you are running 80 to 200 API requests in a matter of minutes.
Most API providers, including Mockupanda, have rate limits. Check your plan's limits and build in appropriate delays between requests if you are doing high-volume launches. A short pause of 1 to 2 seconds between API calls is usually enough to stay well within limits while still processing your catalog quickly.
For truly large batches, consider queuing the jobs. Instead of firing all the mockup requests immediately, push them onto a queue and process them at a controlled rate. Tools like Make have built-in queue management, and custom code solutions can use services like Redis or AWS SQS.
Using Tags to Control Which Products Get Automated
Not every product in your store necessarily needs the same mockup set. You might sell posters, canvas prints, and mugs, each requiring different templates. You can use Shopify product tags to control which template set gets applied.
When your automation receives a webhook, it checks the product's tags. If the tag is `poster`, it uses your poster template IDs. If the tag is `canvas`, it uses a different set. This makes the same automation flexible enough to handle your entire catalog without manual configuration per product.
This kind of tag-based routing is one of the most useful patterns in Shopify automation and it works particularly well for print-on-demand sellers who have diverse product lines.
Keeping Your Template Library Updated
Seasons change, trends shift, and the mockup templates that felt fresh last year might start looking dated. Build a habit of reviewing your template library every quarter. When you update your default template IDs in your automation configuration, every new product from that point forward gets the updated look automatically.
Old products will keep their existing images, which you can update in bulk using a separate automation pass if needed. But the forward-looking benefit is immediate: your new products always reflect your current visual style without any extra work on your part.
Actionable takeaway: Add product type tags to your creation workflow from the start. Even if you only sell one product type right now, the tagging habit means your automation stays flexible as your catalog grows.
Common Mistakes and How to Avoid Them
Not Validating the Design File Before Sending It
One of the most common failure points in this kind of automation is sending a design file URL that is not yet publicly accessible. If you upload a file to a private S3 bucket or a tool that requires authentication, the mockup API cannot fetch it and the render will fail.
Always use publicly accessible URLs for your design files. If you are storing designs in Shopify's own media library, the URLs are public by default. If you are using a cloud storage service, make sure the files are set to public read access.
Overwriting Images You Have Already Customized
If you sometimes manually edit product images after they are created, be careful about re-triggering your automation. If a product update event fires and your automation treats it like a new product, it could overwrite custom images you have added.
The safest approach is to only trigger on `products/create`, not `products/update`. If you need to regenerate mockups for an existing product, do it through a separate manual trigger rather than an automatic one.
Skipping the Testing Phase
It is tempting to build the automation once and immediately point it at your live store. Resist that temptation. Run it in a development or staging environment first, or test it on a draft product that is not publicly visible. Check every step of the pipeline, the webhook receipt, the API calls, the image quality, and the Shopify attachment before you trust it with real listings.
A broken automation that silently fails to attach images is worse than no automation at all, because you might not notice until customers are looking at product pages with no photos.
Actionable takeaway: Write a short checklist of what a successful run looks like: webhook received, four API calls completed, four images attached to Shopify product, images in correct order. Run through that checklist every time you make a significant change to your automation.

Bringing It All Together
Automating your Shopify product images with a poster mockup API is one of the highest-leverage things you can do as a print-on-demand seller. The setup takes a few hours, but once it is running, every new product you create comes out of the pipeline with a full, professional set of listing images without you lifting a finger.
The workflow is straightforward: Shopify fires a webhook when a product is created, your automation extracts the design file URL, it calls the Mockupanda API for each template in your set, and the finished images get pushed back to Shopify automatically. The result is a product page that looks like you spent an hour on it, assembled in under a minute.
If you are not yet comfortable with APIs or automation tools, that is completely fine. The no-code setup approach using tools like Make or Zapier gets you to the same outcome without writing any code. The concepts in this post apply equally whether you are working in a visual workflow builder or a script.
The bottom line is this: the time you save on mockup creation is time you can spend designing more products, optimizing your listings, or doing literally anything else you enjoy more than uploading PNGs. Build the automation once and let it run.
Keep reading
How to Use a Shopify Mockup Generator to A/B Test Product Images and Find the One That Actually Converts
Why Shopify Print-on-Demand Stores With Consistent Mockup Styles Across All Products Get More Repeat Buyers